Blog
Build The Perfect Charcuterie Board
Build the perfect charcuterie board and cultivate confidence in entertaining.
A beautifully curated charcuterie board is a fun way to show off your meats and cheeses. Here’s how to create a real show-stopper!

Charcuterie board
What Belongs On a Charcuterie Board?
In terms of artistry and taste, creating a balance is key. You want a mix of sweet, savory, salty, and spicy flavors. Visually, create harmony by pairing various colorful and multi-textural ingredients together.
Meats
Cured meats are a key part of your board – try a mix of sliced salami, coppa, ham, or pancetta. Don’t forget to add pieces of sausage like bologna or summer sausage. Thick slices of chorizo add texture and a meaty bite. You could also pop on a pot of chicken liver pate or a terrine.
Cheeses
You want a balance of strong, creamy, tangy, and mild cheeses. Of course, camembert and gouda are popular, as is a lovely piece of blue cheese or manchego.
Don’t forget to add soft goat cheese or feta as a contrast to harder cheeses like pecorino or cheddar.
Accompaniments
Adding fresh fruits like grapes, sliced apples, figs, and berries adds sweetness and contrast to your charcuterie board.
Consider a sprinkle of nuts like toasted almonds or hazelnuts. Condiments like honey, fruit preserves, and jams are also at home on your board, as are mustard and pickles. Adding a few briney ingredients like olives or capers is lovely, too.
Choose two or 3 types of bread or crackers as the vehicles to load up all the tasty treats you’ve laid out. To cater to everyone’s tastes, consider multigrain, gluten-free, crusty, and plain white bread options.
Build The Perfect Charcuterie Board
- Choose your board: opt for a wooden or slate board, a marble slab, or even a large serving tray.
- Begin by placing small bowls on the board to hold condiments such as honey, mustard, or fruit preserves.
- Now, it’s time to arrange the meats. Do this in a way that allows easy access for guests to pick up slices without disturbing the overall presentation.
- Follow up by adding an assortment of cheeses.
- To complete the charcuterie board, add accompaniments that complement the flavors and textures of the meats and cheeses.
- Finally, fill any remaining empty spaces on the board with bread and crackers.
Be creative and use what is in season. Combine trendy ingredients with classic favorites, and everyone will want to tuck in.
Tips To The Best Charcuterie Board
- Adding color: fruits, flowers, and veggies all add pretty pops of color
- Vary the textures and shapes: arrange your meats and cheese in different shapes. Roll the slices, fold pieces, or cut cubes out.
- Choose complimentary pairings, for example:
- Sweet, sour, savory: try this Sour Cherry Bourbon Goat’s Cheese
- Tangy and creamy: pickles and olives with creamy cheeses
Remember, the key to taking your board to the next level is to think beyond the basics and incorporate elements that enhance both the visual appeal and taste experience.
Wrapping It Up
Take a look at our Products Page where you will find loads of options to choose from to build the perfect charcuterie board.
Loaded Nachos Recipe With Cheese

Looking for a delicious loaded nachos recipe with cheese? Check out our blog to learn about the top cheese options, including Pepper Jack and sharp Garlic Cheddar.
Learn how to make an easy vegetable nacho recipe that’s a real crowd-pleaser. Perfect for your next game day or party snack!
Which Are These Best Cheeses To Use For A Loaded Nachos Recipe?
Nachos are a classic and beloved Mexican dish that can be made with various cheese types.
However, some cheeses work better than others for creating the perfect flavor and texture in your nachos. We absolutely recommend a combination of our oozy Pepper Jack Cheese and sharp Garlic Cheddar. This is a winning combination for your loaded nachos recipe, but check out these other great options, too.
- Pepper Jack Cheese: Pepper Jack Cheese adds spicy peppers to the buttery semi-firm cheese called Monterey Jack. It is an excellent choice for those who want a little kick in their nachos. Pepper Jack cheese is also great for adding some color to your nachos with its signature speckles.
- Cheddar Cheese: Cheddar is a hard cheese that is aged for a longer period of time, giving it a strong and sharp flavor. It is an excellent cheese for nachos because it adds a bold and tangy taste that complements the other ingredients. Sharp cheddar also has a firm texture that holds up well on top of the tortilla chips, giving your nachos a satisfying crunch. This Garlic Cheddar in our range is absolutely perfect for your loaded nachos.
- Monterey Jack Cheese: Monterey Jack is a semi-soft, mild cheese that melts smoothly and has a buttery flavor. It is a perfect cheese for nachos because it does not overpower the other flavors of the toppings, and it melts evenly to create a gooey layer over the tortilla chips. Monterey Jack is also great for adding a creamy texture to your nachos.
- Queso Blanco Cheese: Queso Blanco is a white cheese with a mild flavor and crumbly texture. It is a popular cheese used in Mexican cuisine and is a great option for nachos. Queso Blanco melts smoothly and adds a creamy and tangy taste to your nachos. It is also a good option for those who want to keep their nachos milder.
How To Make An Amazing Loaded Nachos Recipe
Ingredients:
- 1 bag of tortilla chips
- 1 cup of Pepper Jack Cheese, shredded
- 1 cup of Garlic Cheddar Cheese, shredded
- 1 can of black beans, drained and rinsed
- 1 jalapeño pepper, diced
- 1/2 red onion, diced
- 1/2 cup of corn kernels
- 1/2 cup of diced tomatoes
- 1/2 cup of sliced black olives
- 1/4 cup of chopped cilantro
- 1 tablespoon of olive oil
- 1 tablespoon of taco seasoning
- Salt and pepper to taste
- Sour cream and guacamole for serving (optional)
Instructions:
- Preheat your oven to 375°F (190°C).
- Spread the tortilla chips on a large baking sheet or oven-safe platter.
- In a medium bowl, toss the black beans, jalapeño, red onion, and corn with the olive oil and taco seasoning.
- Sprinkle the bean mixture over the tortilla chips, spreading it evenly.
- Sprinkle the shredded Pepper Jack and cheddar cheese on top of the bean mixture.
- Bake the nachos in the preheated oven for 10-15 minutes or until the cheese is melted and bubbly.
- Remove the nachos from the oven and sprinkle the diced tomatoes, black olives, and chopped cilantro on top.
- Serve the loaded nachos hot, with sour cream and guacamole on the side if desired.
Wrapping it up
A good batch of loaded nachos recipe must be crowned with layers of oozy, cheesy goodness. We have an incredible range to browse through, so check out our Cheese Products Page.
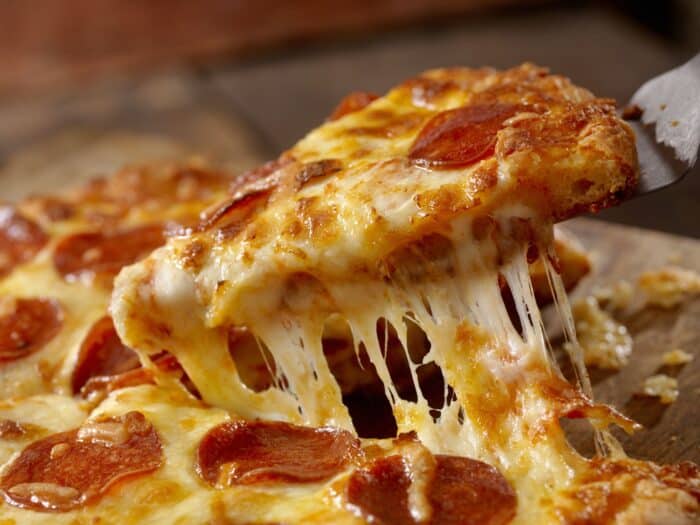
Homemade Cheese Pizza
This easy 3-step homemade cheese pizza recipe is the perfect crowd-pleaser and will soon become a firm favorite in your home.
In this article, we share the elements that go into making a great homemade cheese pizza, the ingredients and steps to making one, and then a few ideas for toppings, should you want to elevate your pizza to Gourmet status!
If you’re into homemade cheesy recipes, take a look at our post about The Best Grilled Cheese Recipe.
What goes into a homemade cheese pizza?
There are 5 key components that you’ll need to make a homemade cheese pizza:
- Dough: A good pizza starts with a good dough. The dough should be light and airy with a crispy crust that is neither too thick nor too thin. The dough should be allowed to rise correctly in the refrigerator or at room temperature to achieve the perfect texture.
- Sauce: The tomato sauce is a critical component of the pizza, and choosing a high-quality tomato sauce with a balanced flavor is essential. The sauce should not be too sweet or acidic and should be applied sparingly to avoid making the pizza soggy.
- Cheese: Cheese is perhaps the most important ingredient in a cheese pizza. Mozzarella is the classic choice for pizza, but other cheeses, such as Cheddar or Provolone, can also be used. The cheese should be grated fresh and spread evenly over the pizza to ensure every bite has a cheesy goodness.
- Toppings: Toppings are a matter of personal preference, but the key is to use fresh, high-quality ingredients.
- Seasonings: A great homemade cheese pizza is incomplete without some seasonings to enhance the flavors. A drizzle of olive oil, a sprinkle of sea salt, and a dash of dried oregano or basil can add delicious flavor to your pizza.
How to make homemade cheese pizza
Ingredients
- 1 pound pizza dough (homemade or store-bought)
- 1 cup tomato sauce
- 2 cups shredded Mozzarella cheese
- 1/4 cup grated Parmesan cheese
- 1 tablespoon olive oil
- Salt and pepper to taste
Instructions
- Roll out the pizza dough to your desired thickness and shape on a lightly floured surface. Transfer the dough to a lightly greased pizza pan or baking sheet.
- Spread the tomato sauce evenly over the dough, leaving about 1/2 inch of space around the edges; sprinkle the shredded mozzarella cheese over the tomato sauce, and then sprinkle the grated Parmesan cheese on top.
- Drizzle the olive oil over the pizza, and then season with salt and pepper to taste. Bake the pizza in the preheated oven (450°F (230°C) for 12 to 15 minutes, or until the crust is golden brown and the cheese is melted and bubbly. Remove the pizza from the oven and let it cool for a few minutes before slicing and serving.
Topping ideas for homemade cheese pizza
If you want to use your cheese pizza as a foundation, here are a few ideas for additional toppings:
- Caramelized onions, our Sweet Fire Goat Cheese, pistachios, and arugula
- Glacier Wildfire Blue Cheese, Streb Meats Fresh Cut Smoked Bacon, and torn fresh basil
- Parmesan, roasted red bell peppers, and anchovies
- Artichokes, roasted oyster mushrooms, and Gruyere
Wrapping it up
We hope this post inspires you to make your own homemade cheese pizza! All the cheeses mentioned in this post are available on our Cheese Products Page.
Why Does Cheese Melt?
Why Does Cheese Melt?
Have you ever wondered why cheese melts so beautifully? This blog post dives into the science behind cheese melting, including the molecular structure of cheese, the types of proteins present in cheese, and the factors that affect its melting properties. So, why does cheese melt?
Whether you’re a cheese lover, a culinary enthusiast, or just curious about food science, this post will satisfy your appetite.

The Science of Melting
The science behind cheese melting is complex and involves the molecular structure of cheese, the types of proteins present in it, and the impact of heat on these proteins.
When cheese is heated, the molecules within the cheese begin to move rapidly, which causes the protein structure to break down, resulting in a smooth and creamy texture.
Molecular Structure of Cheese
Cheese is a complex food item composed of a matrix of proteins, fats, and water. The molecular structure of cheese is made up of long chains of proteins that are woven together in a complex network.
These proteins, including casein and whey, are held together by weak bonds, such as hydrogen bonds and van der Waals forces.
When heat is applied to cheese, these weak bonds break down, causing the proteins to unravel and the cheese to become more fluid.
Factors Affecting Cheese Melting
- Cheese type is a significant factor in determining how it will melt. For example, hard, aged cheeses like Parmesan tend to melt poorly, while soft, creamy cheeses like Brie or Camembert melt very quickly.
- The age of the cheese also plays a role in how it melts. Younger cheeses tend to have more moisture and less fat, making them melt quickly and evenly. In contrast, older cheeses have less moisture and more fat, resulting in a less smooth and evenly melted texture.
- Cheese with higher moisture content melts more quickly and efficiently than those without. This is why mozzarella, which has a high moisture content, is often used to melt pizzas.
- Cheeses with higher fat content tend to melt more smoothly and have a richer texture. This is why cheeses like cheddar or Gouda, which have a higher fat content, are commonly used for melting in grilled cheese sandwiches or mac and cheese.

The Future of Melted Cheese
Technological advancements in food science and engineering are continually evolving, which is expected to impact cheese’s melting properties significantly. For example, researchers are currently exploring using ultrasonic waves to alter the structure of cheese proteins, potentially improving the melting properties of certain cheeses.
There is also a growing demand for new, innovative cheese products with unique melting properties. Cheese producers are experimenting with new cheese blends and formulations to create cheeses that melt more easily or have a creamier texture. This trend will continue as consumers seek new and exciting culinary experiences.
Wrapping It Up
Whether it’s a gooey grilled cheese sandwich, creamy mac and cheese, or a decadent fondue, melted cheese is a beloved ingredient that will continue to delight cheese lovers for years.
The Best Grilled Cheese Recipe
The Best Grilled Cheese Recipe

Grilled cheese is a beloved classic comfort food for many people around the world, and there are many reasons why it has earned such a devoted following. One reason is that it is incredibly easy and quick to make, requiring only a few simple ingredients and minimal preparation. It’s a dish that can be made at home, in a dorm room, or even on a camping trip with just a few basic supplies.
Grilled cheese sandwiches evoke a sense of nostalgia and comfort for many people. Childhood memories of after-school snacks, mom’s grilled cheese, and lazy Sunday mornings can all be associated with this classic sandwich. As such, it has a special place in many people’s hearts and can bring about feelings of warmth and contentment.
What goes into the perfect grilled cheese?
The perfect grilled cheese sandwich is a combination of several elements that come together to create a harmonious and delicious flavor and texture profile. The following are some key components that go into making the best grilled cheese:
- Bread: The bread used, should be sturdy enough to hold the filling without falling apart or getting too soggy. Many people prefer a bread with a crispy crust and a soft interior, such as sourdough or French bread.
- Cheese: The type of cheese used is a matter of personal preference, but it should be a variety that melts well and has a rich flavor. Cheddar, Gouda, Swiss, and provolone are all popular choices.
- Butter: The butter used for grilling the sandwich should be unsalted and at room temperature so that it spreads easily onto the bread. Some people also like to use mayonnaise or olive oil for a different flavor.
- Temperature: The heat of the skillet or griddle should be medium-low so that the sandwich has time to cook evenly without burning.
- Cooking Time: The sandwich should be cooked for 2-3 minutes on each side, or until the cheese is fully melted and the bread is golden brown and crispy.
- Additional ingredients: While a classic grilled cheese is simply bread and cheese, some people like to add extras like bacon, tomato, avocado, or caramelized onions for a unique twist.
- Cheese Melting Techniques: To achieve the perfect melt, grating the cheese rather than slicing it can deliver a more even and quicker melt.
Steps to making the best grilled cheese
Making the perfect grilled cheese sandwich involves several key steps that come together to create a delicious and satisfying meal. Here’s how to do it right:
- Buttering the bread: The first step in making a grilled cheese sandwich is to butter the bread. Take two slices of bread and spread a generous amount of unsalted butter on one side of each slice. This will help the bread to toast and become golden brown while also adding a rich, buttery flavor to the sandwich.
- Cheese selection and preparation: The type of cheese used is a matter of personal preference, but it should be a variety that melts well and has a rich flavor. Grate or slice the cheese and evenly distribute it over one of the buttered slices of bread. If you are adding any additional ingredients, now is the time to layer them on top of the cheese.

- Grilling the sandwich: Place the other slice of bread on top of the cheese and press down gently to create a sandwich. Heat a skillet or griddle over medium-low heat and place the sandwich onto the surface. Cook for 2-3 minutes on each side, or until the cheese is fully melted and the bread is golden brown and crispy. To ensure even cooking, you can press down on the sandwich gently with a spatula while it is cooking.
- Additional ingredients or variations: While a classic grilled cheese is simply bread and cheese, you can add a variety of additional ingredients or variations to create a unique and flavorful sandwich. Some popular options include adding cooked bacon, sliced tomato, avocado, caramelized onions, or a sprinkle of herbs or spices.
Pro Tips To The Perfect Grilled Cheese
Grilling the perfect grilled cheese sandwich is all about getting the right temperature, timing, and cheese melting techniques. The following are some tips for achieving grilled cheese success:
- Temperature: To ensure that the sandwich cooks evenly and does not burn, it’s important to cook it over medium-low heat. This will give the bread enough time to toast and become golden brown without burning. If the heat is too high, the bread will burn before the cheese has had a chance to melt.
- Time: The cooking time for a grilled cheese sandwich should be 2-3 minutes on each side, or until the cheese is fully melted and the bread is golden brown and crispy. It’s important not to rush the cooking process by turning up the heat or flipping the sandwich too often. This can result in uneven cooking and a sandwich that is not fully melted or toasted.
- Cheese melting techniques: To achieve the perfect melt, many people prefer to grate their cheese rather than slicing it. This allows the cheese to melt more evenly and quickly. Another technique is to cover the skillet or griddle with a lid while the sandwich is cooking. This traps the heat and helps the cheese to melt more quickly and evenly.
- Experiment with Cheese Varieties: While cheddar cheese is a classic choice for a grilled cheese sandwich, there are countless other cheese varieties to try. Some popular options include Gouda, Swiss, provolone, mozzarella, or a combination of different cheeses. Each type of cheese will bring its own unique flavor and texture to the sandwich.
- Add Crunch with Ingredients: If you want to add a crunchy texture to your grilled cheese sandwich, try adding ingredients like bacon, crispy onions, or thinly sliced apples. These ingredients will add a satisfying crunch and extra flavor to the sandwich.

Wrapping it up
A grilled cheese sandwich is a classic comfort food that has been enjoyed for generations. With the right ingredients and techniques, it’s easy to create a perfectly toasted and melted sandwich that is satisfying and delicious.
By following the steps outlined in this blog post, you can create a grilled cheese sandwich that is sure to please any cheese lover.
Whether you prefer a classic grilled cheese or like to experiment with different cheeses and ingredients, these tips will help you achieve grilled cheese greatness. So, go ahead and give it a try – your taste buds will thank you!
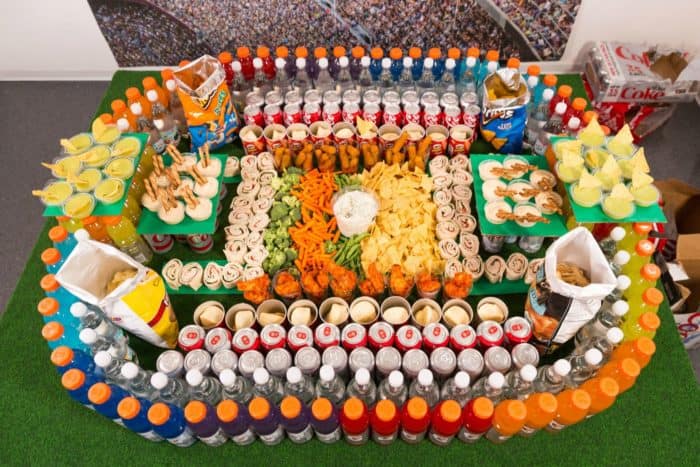
Superbowl Snacks!
The biggest football game of the year is right around the corner! Don’t let your snack game pale in comparison. Here we have some fun ideas for presentation and taste purposes and a Shisler’s shopping list to make sure your snacks pack the same wow factor as the game!
National Cheese Lovers’ Day
Did you know that tomorrow, January 20, is National Cheese Lovers’ Day? Although this “national holiday” may not be decreed by Congress or have much of a historical background, we know that many of you are Lovers’ of Cheese and always looking for a way to celebrate that love. So, let’s take a look at some fun facts and new cheesy things to try out in celebration!
Valentine’s Day- A Brief History
Valentine’s Day is one month away. And, just like that, the season of LOVE is upon us! The time of year that sprinkles chocolate like water, pays the overhead of florists and Hallmark for the whole year, pops construction paper cut outs of asymmetrical hearts with crayon I Love You’s in the windows of homes around America. But where does this tradition come from?
A 2021 Virtual Comment Card
Good Afternoon and a very happy weekend to you all! It’s a beautiful day in Ohio as we are seeing the sun for the first time in a while. Today, we would like to ask you what you would like to see from Shisler’s in this bright new year. Take a moment to comment on the blog, via email or on social media about your thoughts!
New Year’s Resolutions
Ok, ok….it’s the second week of the New Year. And by now a lot of folks out there are diving deep into their New Years’ Resolutions. Especially following that ten months of quarantine!
My sister and I occasionally joke about the “Quarantine 19.” I only wish we were actually joking. LOL. Well, Shisler’s Cheesehouse is not just all about the candy and cookies and cheese and meats. Well, not ALL about those scrumptious treats 🙂 We also offer plenty of skinny alternatives to satisfy your snack cravings while sticking to your resolves!

