Tag: Recipes
Peanut Butter: The Perfect Addition to your Baking
We love finding new baking ideas and we also love peanut butter, so today we are combining the two to share with you some fun ideas for baking with peanut butter.
- Peanut Butter Cookies
Best served with a glass of milk, these are a true classic. Add peanut butter to your cookie batter or spread it on top. You can go for straight peanut butter or add chocolate – choose your favorite. Cookies also make great ice cream sandwiches!
- Peanut Butter Cheesecake
Mix the peanut butter into the cheese, use peanut butter cookies in the base, or even create a peanut butter topping. You could even chop some Heggy’s Milk Chocolate Peanut Butter Creams and stir them in. However you decide to bring peanut butter into your cheesecake, you know that it will be delicious.
- Peanut Butter Brownies
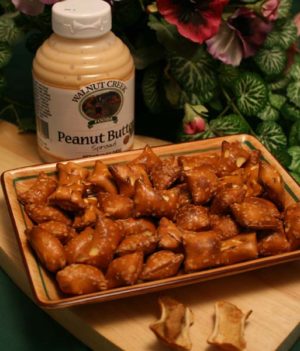
Take your favorite brownie batter and swirl in some peanut butter. You could even add a crunchy topping with some crushed up Peanut Butter Pretzels. Try a blondie with white chocolate if you have a really sweet tooth.
- Peanut Butter S’mores
Just when you thought s’mores couldn’t get any better, we added peanut butter! You can do this in a couple of different ways. Either make a normal s’more and add a smear of peanut butter to one of your graham crackers or replace your chocolate with a peanut butter cup. You could even add some caramel if you want a real treat.
5. Peanut Butter Pancakes
Pancakes aren’t just for breakfast. They make a great dessert too! This filling will work for both. Put peanut butter, chocolate chips and slices of banana in your crepes before rolling them up.
6. Peanut Butter Sundae
Create a sauce by heating 3 parts caramel, 1 part peanut butter and 1 part milk until it is smooth. Pour it into the bottom of your sundae glass. Layer it with ice cream, banana, caramel, and any other ingredients that you like. Top with a sprinkling of chopped peanuts.
7. Peanut Butter Popcorn
Combine peanut butter with syrup to drizzle over popcorn. This is a messy treat so make sure that you have cloths on hand to clean up!
8. Protein bars
If you want to create a healthier treat that will give you plenty of energy, make a peanut butter based protein bar. These can be made with peanut butter, honey, protein powder, and oatmeal, but there are lots of different recipes out there.
Have you been inspired to bake with peanut butter? Then pick up a jar of our Amish Peanut Butter Spread today. Made locally from a special blend of all natural ingredients, it’s sweet and creamy, with a soft and silky texture, perfect for baking.
If you plan to serve these at a party or take them along to an event, please be careful to ensure that no-one present has a nut allergy and always label your dish stating its ingredients. We would hate for someone’s baking to become a health risk.
Bread: How to Make It
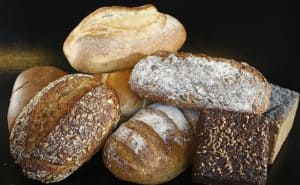
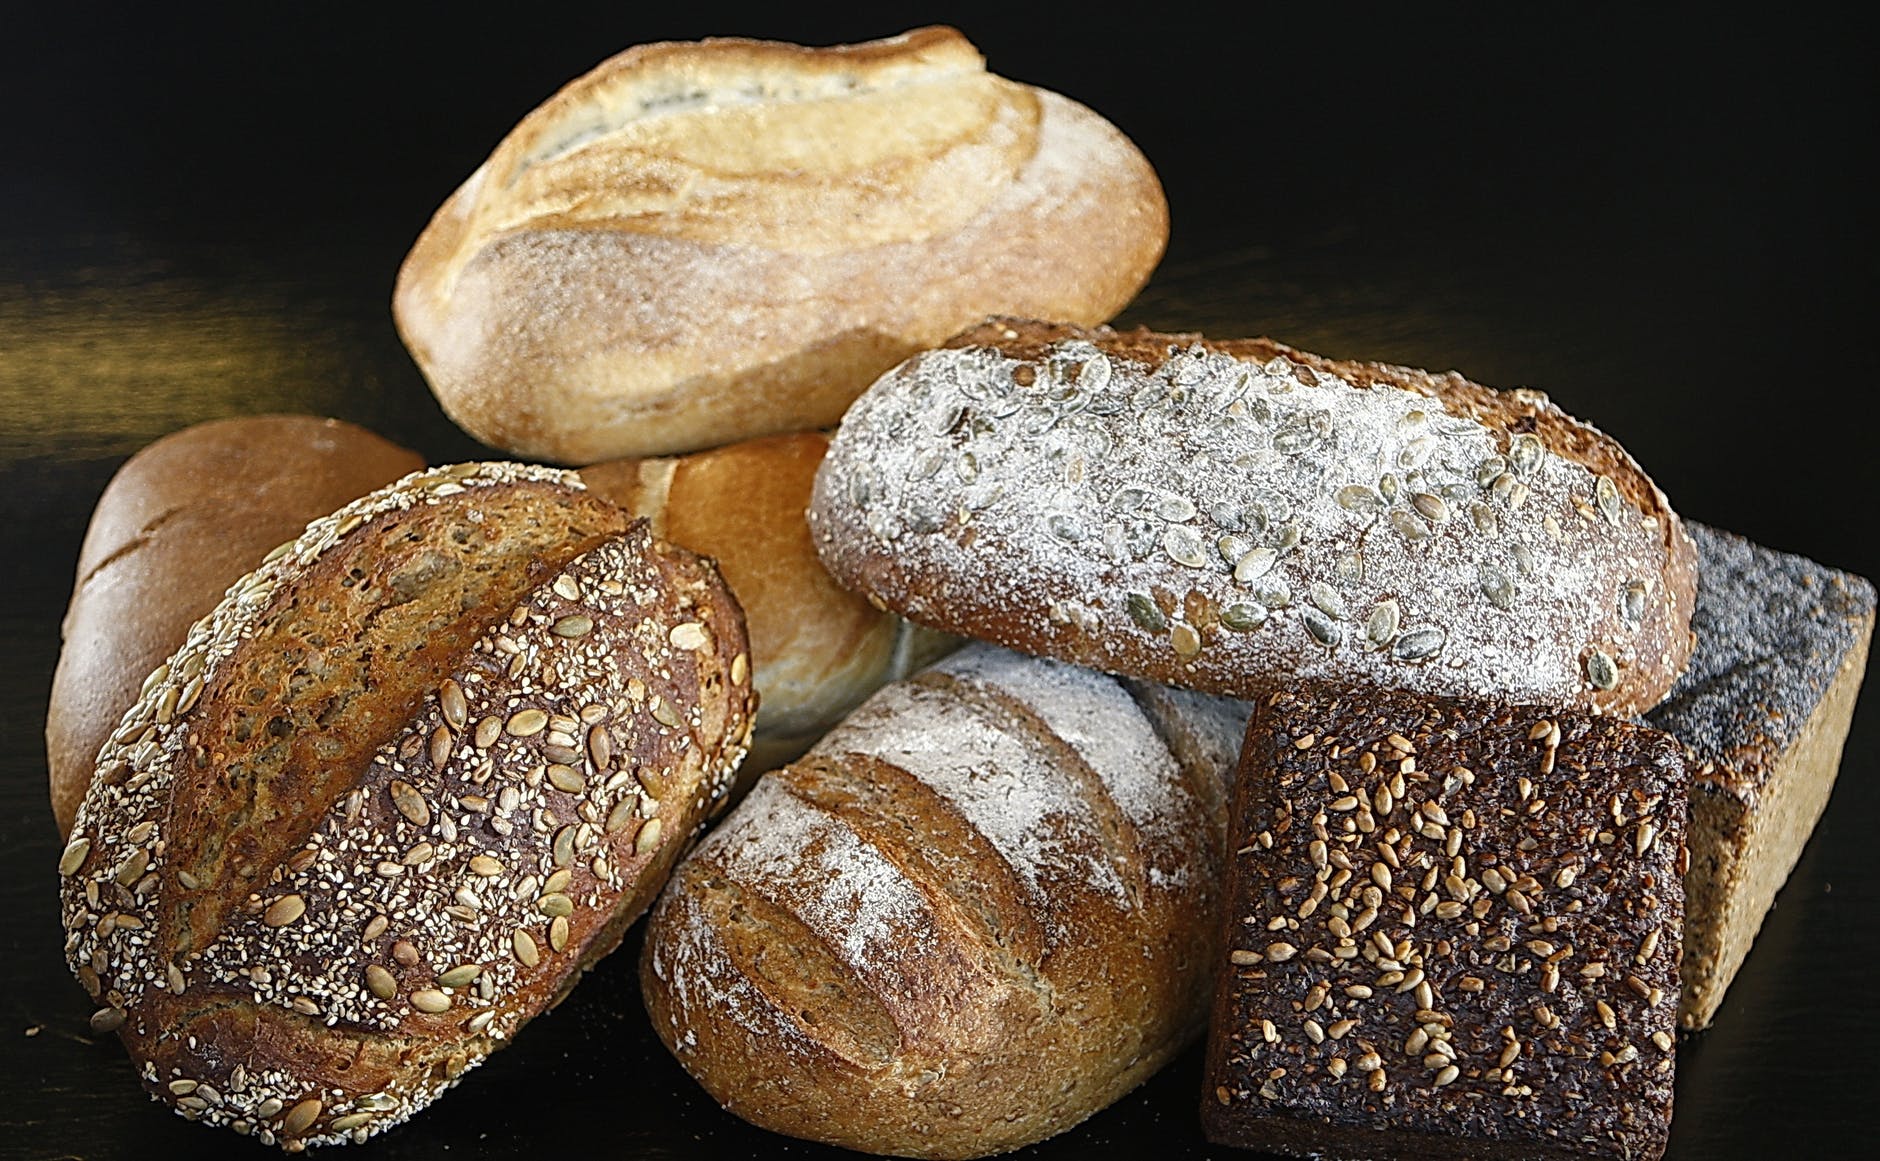
We all love bread. It’s perfect for breakfast, lunch and dinner. Of course, our preference is to eat it with cheese. Today, we’re going to show you three ways to make your own bread.
1. Make it completely from scratch
If you’ve never made bread before, you’ll find that it’s much easier than you think. All you need is flour, salt, yeast, some kind of fat, and water. You can change various elements of this, but we’ll show you how to make a simple white bread.
You will need:
500g/18oz strong white bread flour, plus a little extra for dusting
2 tsp salt
7g/ 1/4oz sachet of dried yeast
3tbsp olive oil or melted butter
300ml/10 fluid oz water
A mixing bowl
A loaf tin
1. Mix the flour, salt and yeast together in a bowl.
2. Make a well in the centre and pour in the water and oil/melted butter a little at a time.
3. Mix everything together until you have a dough. You may not need all of the liquid to achieve this, but likewise, if it is a little stiff you can add more water.
4. Knead the dough for 10 minutes until you have a silky, smooth dough. There are lots of videos available online if you haven’t kneaded a dough before.
5. Put the dough into an oiled bowl and leave it to rise for one hour. It should double in size.
6. “Knock back” the dough. This involves pushing the air out of it and kneading it again briefly.
7. Shape the dough into your loaf tin. If you don’t have a loaf tin, line a baking sheet with parchment and form the dough into a ball. In both cases, leave it to prove for another hour.
8. Bake at 420F for 25 – 30 minutes until it is golden brown and the loaf sounds hollow when you tap the bottom.
9. Cool on a wire rack.
You’ll want to dig in straight away, but allow it to cool slightly so that it is easier to slice.
2. Use a bread maker
A bread maker essentially involves putting the ingredients above into the bread maker and letting it do the work. They will usually come with lots of recipes so that you can make different types of bread as well as preparing pizza dough or cakes that you can then bake in the oven.
Often, you can even set a bread maker so that it makes bread overnight and you wake up to the smell of freshly baked dough in the morning.
3. Use a pre-made mix
These are available in lots of supermarkets. Usually, you simply add water, knead the dough and put it in the oven. This is a quick way to make bread but we would recommend making it from scratch if you have time. It only takes a little longer but the taste is incredible.
Once you’ve conquered the technique, you can start changing your creations. Try wholemeal, multigrain or even add herbs and spices.
Now all you have to do is decide how you want to eat your bread. Slather it with butter, add some cheese, dip it in soup: the choice is yours!
Chocolate Cheese? 6 Ways to Eat this Unusual Treat
We know what you’re thinking. Surely, you can’t have chocolate and cheese? But we’re here to tell you that at Shisler’s Cheese House, you can, in fact, have both!
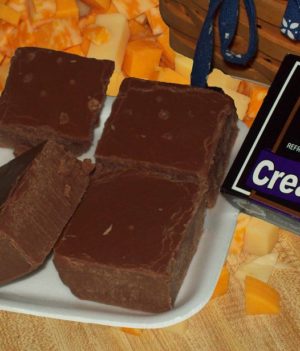
Our chocolate cheese is made from a local recipe and all locally produced ingredients combining fine chocolate fudge with premium cream cheese. The result is the perfect smooth and creamy balance of sweet chocolate and mild cheese.
This could be a perfect gift for that food lover in your life who has everything and is always on the hunt for new flavors to try.
We’re also sharing several different ways to really enjoy this here on the blog today. We’re sharing sweet ideas, but we’d love to hear from you if you enjoy this in a savory dish!
1. As a delicious snack
Our chocolate cheese is perfect for those mid-afternoon sweet cravings. Some of our customers even like to enjoy it with peanut butter. We love it as a movie night treat with our popcorn! It’s also delicious when paired with nuts, especially almonds. It can be easy to get bored when we eat the same snacks all the time, so try something new today.
2. Baked into brownies
If you love cheesecake brownies, this is a little bit of a cheat to make them even more quickly and easily than usual. Fold some chopped up chunks of chocolate cheese into your favorite brownie mix for a cheesecake style swirl. You’re sure to impress at the next bake sale with this innovative twist.
3. With a glass of dessert wine
Serve with a glass of sweet Moscato wine after dinner and see if your guests can guess what they are eating! You could even add to the fun by serving other mysterious foods, or give them a clue by creating a whole cheeseboard full of sweet and savory pairings. Add jellies and pickles to really get creative.
4. Grated over cakes and desserts
Instead of a dusting of cocoa or powdered sugar, add the wow factor by grating over a little chocolate cheese. It will look great and add a hint of chocolate flavor to your creations.
5. Grated over hot chocolate
You’ve got whipped cream, mini marshmallows, a chocolate flake, and now… chocolate cheese! This will melt into the top of your hot chocolate for a delicious, creamy effect.
6. In an ice cream sundae
Just as you might add cubes of fudge to your favorite ice cream sundae, you could add chopped chocolate cheese. Be sure to pile it in with plenty of vanilla and chocolate ice cream, brownies, chocolate sauce, and sprinkles. You could even add a cherry sauce for a real pop of flavor.
We hope you enjoyed our ideas for eating chocolate cheese today. We are really excited to offer you chocolate cheese at Shisler’s Cheese House and we hope to see you soon to try it. We challenge you to find your favorite way to eat it and let us know in the comments.
You can even order online right now.
Easy-Cheesy Halloween Recipes!
Halloween is one of the best times of the year. What better way than to enjoy it by exploring all the different ways you can make spooky Halloween snacks. Be it for a Halloween party for your kids, an adult get-together or a spookily themed dinner with the family, these extra cheesy recipes- with a twist will be a cheese lovers heaven this Halloween!
Not only are these Halloween recipes for cheese lovers, but they are quick and easy to make. So, if you have work on Halloween, you can quickly whip them in a short amount of time so no one misses out!
Halloween Cheese And Crackers

Cheese and crackers are a quick and easy snack to add to a party platter of spooky delights. What makes this recipe even better is that you can have some fun with the kids making these. All you really need is a few different Halloween cookie cutters which you can purchase from your local craft store and some delicious cheese from Shisler’s Cheese House.
Cheddar would be the best cheese for this, at Shisler’s Cheese House we have a range of different cheddars to suit your palette:
– White Cheddar
– Orange Cheddar
– Garlic Cheddar
– Smoked Cheddar
Now you just have to cut some thin slices of your cheese and use your cookie cutter to form the spooky shapes and then place them on your crackers! It is as easy as that! Don’t throw out your outline leftovers, you can just save the cheese for a topping on a family dinner or just for a snack! Enjoy.
Halloween Cheese Board

Everyone loves a cheese board! If you are attending a more sophisticated event this Halloween but you would like to add a twist, bring a spooky Halloween board! Just cut some slices of your favorite cheese and use cookie cutters to make pumpkins and ghosts out of the cheese. Don’t forget to bring the wine!
Check out our website to see all the delicious cheeses you can get for your board.
Crescent Roll Witch Hats

This recipe is something different but equally delicious. With Halloween being very much geared towards a sweet tooth, you’ll be happy to know that this recipe is more on the savory side for those who love Halloween and savory foods!
Again, this recipe is super easy to make and creative!
What You Need
1 package of Crescent Rolls (original)
Shisler’s Cheese House Bologna
2 types of cheese with contrasting color (Cheddar and Havarti from our store)
Basil
What To Do
1. Open and unroll one package of Crescent Rolls.
2. So hats maintain their shape, use a knife to separate segments.
3. Cut salami slices and a portion of cheddar cheese into thin strips.
4. Place bologna and cheese strips on top of the widest part of the roll.
5. Roll it up to create the hat brim.
6. Cut cheddar cheese strips and cheese squares to make the hat band and buckle.
7. Arrange cheese above the brim of the hat.
8. Lightly sprinkle basil over the entire roll.
9. Bake according to package directions.
Creating Homemade Coffee Cheese
Back in time, the coffee cheese was originally created from warm milk, straight from a reindeer and put in coffee to form a kind of snack. It was irresistible for someone of Northern Sweden and Tornedaling and can be just as mouthwatering to you!
Now, you may not have a reindeer or barn at hand, so you can just use raw milk or whole milk if you cannot get raw milk. Some of the time, you might not be able to get raw milk so pasteurized is fine to use, just be sure not to get UHT (Ultra-High Temp).

Recipe
What You Need
70 oz. of milk
2 oz. heavy cream
2 tsp liquid rennet
What To Do
First, pour the cream and milk into a large pan and heat to 99F.
Take the pan off the heat and stir in the rennet. Allow it to stand for 30-40 minutes or until the liquid has curdled.
Now stir gently with a slotted spoon while heating up the liquid to 99F again.
Once heated, spoon the cheese from the edges towards the center of the pan.
When the cheese is formed into a ball in the middle of the pan, heat it up to boiling point, but do not allow to boil. Take the pan off the heat to stop the whey boiling.
After taking the pan off the heat, place the cheese in either a large strainer, colander or even a cheese mold if you have one.
Be sure to press out the whey as much as possible from the cheese. Place a weight over the cheese and leave for a few hours so the remaining whey can be pressed out and the cheese dries up.
Preheat the oven to 392F and press the cheese into a greased casserole dish. Now bake the cheese into the center of the oven until it is browned.
You don’t have to bake the cheese, but it tastes a lot better when baked.
If the edges of the cheese become hard, you can just wrap it in aluminum foil afterward to soften them up.
There are many uses for the whey which is drained, for instance, using it to bake soft bread.
When the cheese is cooled, cut it into small squares, put some in a coffee cup and fill the cup with fresh coffee. Now stir it all up and eat with a spoon. The taste is so delicious, so enjoy!
If you have any left over, package it well and freeze it.
Chocolate Creations Part Two: Homemade S’mores
S’mores are an all-time American favorite, they take us back to times when life was much simpler, sitting by a campfire with our friends, singing campfire songs and burning the marshmallow to our s’more was our only worry. Let’s get back that delicious piece of childhood by taking it to the next level and making the best s’mores you’ll ever taste, using fine chocolate.
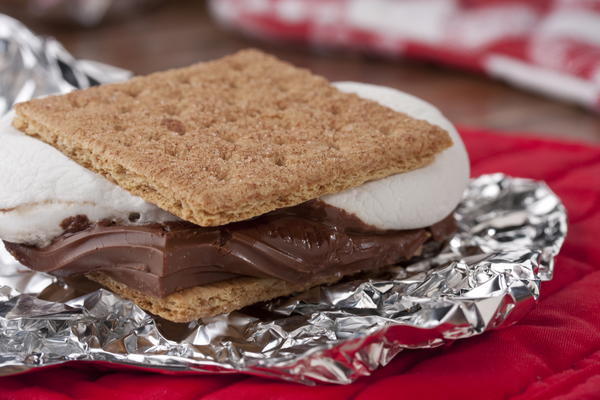
Recipe
Makes: Around 7 S’mores
What You Need:
1 chocolate bar of the finest dark chocolate of your choice.
Marshmallows
Graham crackers
What To Do:
From experience, we all know that how we roast the marshmallows is the most important part of the process. The best way to roast the marshmallow is to toast it without it catching fire but to let the fire mature into a glowing ember around the marshmallow. This allows the marshmallow to be roasted evenly so it is a perfect, gooey consistency on the inside and crispy on the outside. You should slowly rotate the marshmallow over hot coals until it is golden brown on all sides.
In the meantime, set a large piece of chocolate on a graham cracker by the fire so it can begin to warm.
Once your marshmallow is done, scoop it off the stick with the cracker and close together to make a s’more sandwich. Be sure to eat it straight away and don’t be afraid to let out your inner child and get messy with it.
You could also wrap the other s’mores in tin foil to keep them nice and warm and extra gooey.
Enjoying Cheese For Breakfast
Breakfast really is the most important meal of the day, especially when you’re a cheese lover and starting your day off right by eating it for breakfast! There’s nothing better than waking up for a long day at work or school with a delicious plate of cheddar or Parmesan molded into our favorite breakfast dishes.
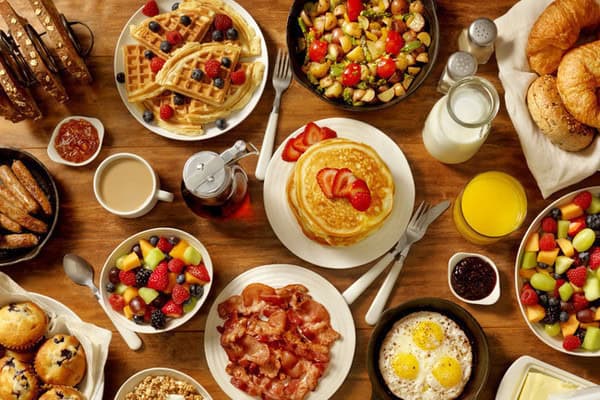
Not only is cheese delicious, but it is a good source of protein which is essential to start the day off right with, especially for growing children and adolescents. It is known that a lot of studies show that eating breakfast improves concentration, memory, problem-solving and your mood (for those who struggle to wake up!) So, that might solve your morning blues, some toasted bread with melted Gruyère to see you through to lunch.
Here are some quick and easy ways to incorporate cheese into your breakfast:
Toast And Bagels

Chicken And Brie Bagels
Divide the bagels and layer one half with the chicken and a slice of Brie. Then add a spoonful of cranberry sauce and place the two halves together again. Cook the bagels for 10 minutes at 350 degrees F.
Banana And Cheese Bagels
This one is relatively simple, it involves toasting the bagels and topping with a spoonful of cream cheese, banana and a sprinkle of cinnamon.
Stilton and Apricots On Toast
Begin by lightly toasting a bread of your choice and spreading one side with butter. Then place a slice of Stilton and canned apricot halves on top of the toasted bread and sprinkle it with a bit of sugar and grill it until the cheese melts.
Other Cheese Toppings On Toast
There are so many variations and options you could go with for this breakfast idea, here are some more unique combinations you could try on toast:
– Cherries, Pecans, Brie and sugar
– Blue cheese and fig spread
– Sharp Cheddar with a marmalade spread
– Parmesan and butter (yum!)
Eggs
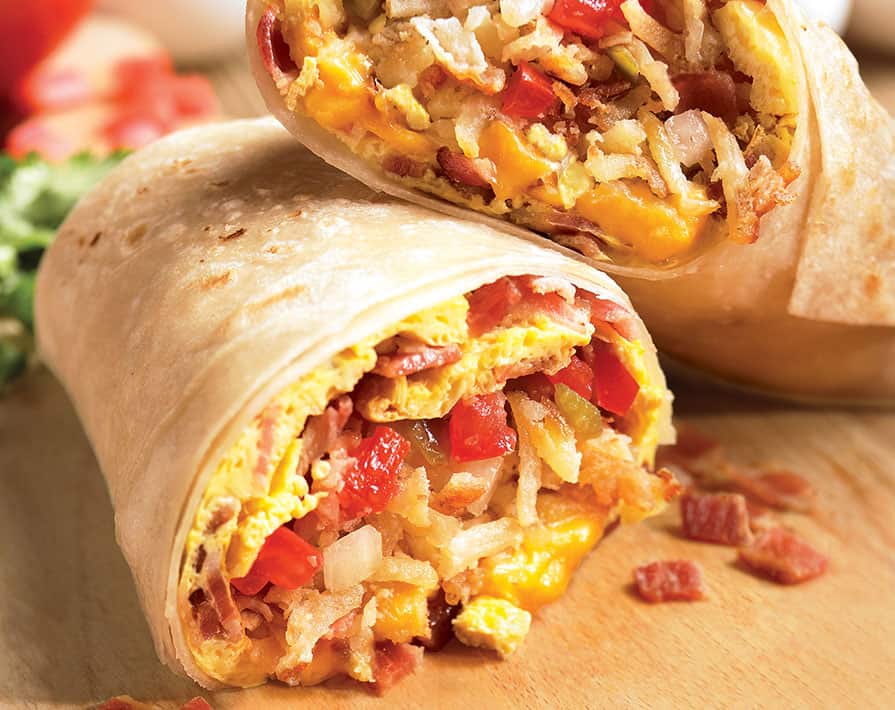
Breakfast Burrito
Breakfast burritos are a classic in America, originating from Hispanic cuisine. Place scrambled eggs on top of a flour tortilla with a bit of salsa and grated Cheddar.
Greek Omelet
Greek cuisine is very big on cheese so a Greek omelet is perfect for this breakfast guide. Chopping up a mixture of spinach leaves, garlic, red onions, and tomatoes for them to be sautéd in a skillet over medium heat until tender. You then beat the eggs with just a drop of water and pour it over the spinach mixture. The eggs will then begin to set, so use a spatula to lift the omelet and let the uncooked portion flow to be cooked. Then, once the omelet is close to being set, crumble some Feta cheese and then cook until it is set.
Southern Style Breakfast Pizza
This unusual, but a delicious style of breakfast can be achieved by scrambling some eggs with a drop of milk and some diced green onion. You then prepare a pizza crust and place it on a baking sheet and spread it with salsa like you would a regular pizza. Then top it with scrambled eggs, cooked bacon and shredded Mexican Queso or Monterey Jack cheese. Bake at 400 degrees F for 10 minutes and enjoy.
Pita Pocket
This simple breakfast consists of scrambling a few egg whites and shredded Cheddar with chopped onions mushrooms, and peppers. You then stuff the food into toasted halves of pita bread and wrap it in foil so you can go about your travels if you need to.
Dips And Spreads
Cinnamon Cheese Spread
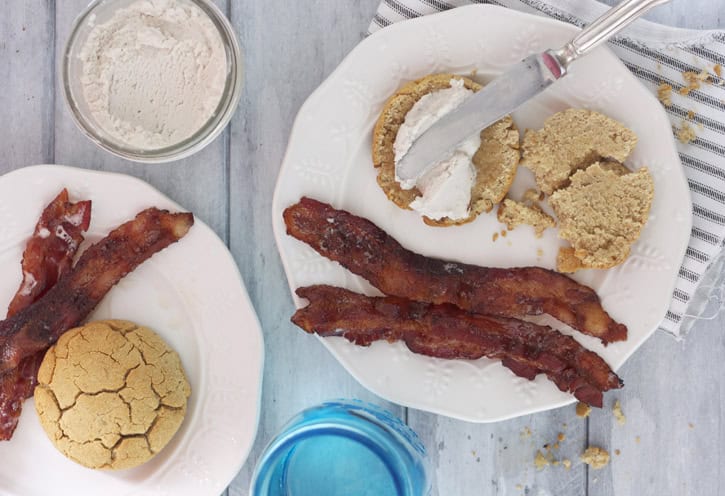
In a food processor or a with a blender, blend cream cheese while adding sprinkles of cinnamon, sugar and a handful of raisins or dried fruit of your choice. You can then chill it in the refrigerator and serve on pancakes or toast.
Ricotta Fruit Dip
This delicious dip is a blend of ricotta cheese with sugar, orange zest, and orange juice. You can dip it with your breakfast fruits such as melon and strawberries.
Cream Cheese Dip
Make your mouth water with cream cheese and chocolate spread mixed together to spread on toast and enjoy!
The Answer Is Feta
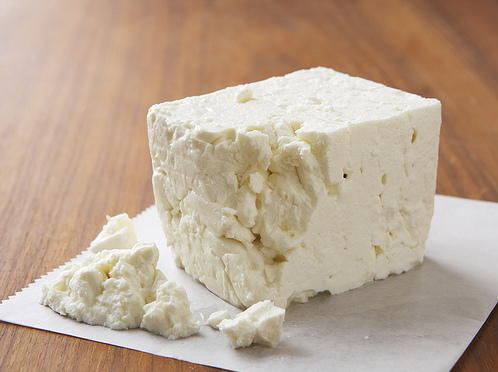
Image Source: irepo.primecp.com/2016/03/257238/recipe-1641_Large500_ID-1435983.jpg?v=1435983
Soaking chicken overnight in brine is an age-old technique. Brining a chicken seasons it through and through, locking in the moisture for tender meat.
However, unless you work in a Greek restaurant, going through 600 pounds of feta cheese a month, you probably won’t think to use feta as brine instead of plain salt water. At the Greek restaurant Souvla in San Francisco, that’s exactly what they did!
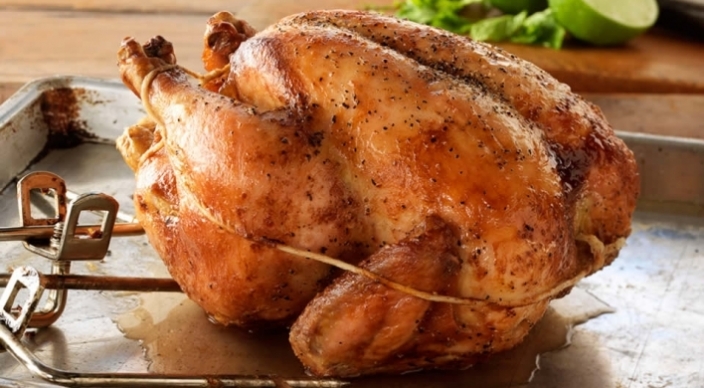
Image Source: 476343dd60686491a262-192409bd95508847c5120d21ffc8ab86.ssl.cf2.rackcdn.com/admin/uploads/transforms/20151023095545_576_13_704x388.jpg
The process of creating a feta brine involves the actual salt water liquid that preserves the cheese during storage. With going through so much feta cheese a month, the restaurant also went through a lot of the salt water solution that was used to store their feta. They were simply tired of seeing so much brine go to waste.
The brine is a lot more complex than salt water and has a fermented pickled flavor, along with an umami character which the restaurant knew could be repurposed. With that, Mr. Cervone came up with the brilliant idea to use the brine on the rotisserie chickens, which were served at the restaurant and sold as takeout. Not only did it make the chicken even more plump and juicy, it also added a pleasant earthiness to the meat. It also sparked immense popularity at the restaurant with how delicious the chicken is and now every night they go on sale, they are sold out very quickly!
Now although you may not have the commercially used feta brine, you can actually purée feta cheese in water and use that in its place. You marinate your chicken in the mix and store it overnight in the fridge. The following day, pat the chicken dry, cover it with lots of grated lemon zest, freshly ground black pepper, and dried oregano. You then roast it how you would any chicken and let your senses burst with this juicy, feta infused chicken!

Image Source: finecooking.com/CMS/uploadedImages/Images/Cooking/Articles/Issues_91-100/051100074-03-how-to-make-feta_ld.jpg
Pumpkin Rolls Will Leave You “Fall”ing For More
As we begin turning the page on the final week of October, we are surely at the heart and splendor of Fall. With Fall, especially as we head through the last week of October and the great, mysterious and trick-filled holiday, that is Halloween, come pumpkins, scarecrows, jack-o-lanterns, costumes, trick-or-treat, Halloween parties, hayrides and many other festivities representative of the holiday also known as “All Hallow’s Eve”.
Before we delve into a fantastic and delicious holiday recipe I’ll share with you, I wanted to take a moment to divulge some of the lesser known history of Halloween. or as it originally was termed, “All Hallow’s Eve”. As we all know, Halloween has become holiday where people of all ages dress up in costume, go around their neighborhoods, and ring the doorbell of any house whose porch light is on and say “trick-or-treat”. The door would then open (hopefully) and the trick-or-treater would be greeted with candy or chocolate or any other kind of Halloween treat. People of all ages would do this on Halloween night until their hearts were content with the amount of Halloween goodies that had aggregated over the entirety of the night. Because of this tradition of going from house-to-house, saying trick-or-treat, and receiving treats on Halloween night, this night also became known as “Beggers’ Night”.
Now for the untold story of Halloween, and while many are versed in this story or are familiar with bits and pieces of the story, allow me to divulge the history of Halloween, in a nutshell, of course. Halloween was original called, “All Hallow’s Eve” and had more religious and spiritual meaning than it does today, as commercialism has taken over the holiday, as it does with most. The original intent of “All Hallow’s Eve” which still is observed today, for the most part, was to wear costumes and masks to disguise oneself in order to thwart off and frighten the evil or “malignant” spirits that, according to legend, roamed the world of the living for one night, “All Hallow’s Eve”. This night had a connection to the Christian Holy Day of “All Saints Day” which falls the day after Halloween. So, for all intents and purposes, All Hallow’s Eve was a night in which people dressed up to disguise themselves in mask and garb in order to scare off any evil spirits that may “stain” the purity of the Holy Day of All Saints Day. Through the years and centuries to come, as you can see, All Hallow’s Eve garnered much attention, especially through commercialism and transpired into what is known today as Halloween.
To celebrate the spirit of the holiday, here is a famous recipe for Pumpkin Rolls. A recipe that will have you begging for more!
 Photo: http://foodnetwork.sndimg.com/content/dam/images/food/fullset/2012/11/19/1/YW0202H_pumpkin-roll-recipe_s4x3.jpg
What You’ll Need:
- 3/4 cup all-purpose flour
- 1 cup granulated sugar
- 1 teaspoon baking soda
- 2 teaspoons pumpkin pie spice
- 1 cup pumpkin puree
- 3 eggs
- 1 cup plus 2 tablespoons confectioners’ sugar, divided
- 1 (8-ounce) package cream cheese, softened
- 1/2 stick butter
- 1 teaspoon vanilla extract
What To Do:
- Preheat oven to 375° F. Coat a rimmed 10″ x 15″ baking sheet with cooking spray.
- In a large bowl, combine flour, granulated sugar, baking soda, and pumpkin pie spice.
- Stir in pumpkin and eggs. Pour mixture onto prepared baking sheet, spreading evenly.
- Bake 12 to 15 minutes, or until a wooden toothpick inserted in center comes out clean.
- Remove from oven and invert onto a clean kitchen towel that has been sprinkled with 2 tablespoons confectioners’ sugar.
- While cake is still hot, roll it up in the towel jelly roll-style from the narrow end; cool on a wire rack.
- When cool, unroll cake and remove towel.
- In a small bowl with an electric mixer on medium speed, beat cream cheese, butter, vanilla, and remaining confectioners’ sugar.
- Spread onto cooled cake and immediately re-roll (without towel).
- Place on serving platter and refrigerate until ready to serve. Cut into slices just before serving.
- To give this the final touch, sprinkle on some confectioners’ sugar just before serving.
Recipe Source: http://www.mrfood.com/Cakes/Pumpkin-Spice-Roll
Amazing Recipes To Satisfy Your Hunger For Cheese
Something warm for lunch: straight-from-the-oven ham and cheese turnovers.

INGREDIENTS
- 1 1-pound package refrigerated pizza dough
- 8 ounces deli ham, thinly sliced
- 4 ounces Swiss cheese, thinly sliced
- 1/2yellow onion, cut into thin rings
- 2 teaspoons whole-grain mustard
- 2 tablespoons extra-virgin olive oil
- 1 small head romaine, torn into pieces
- Heat oven to 400° F. Roll the pizza dough into a 14-inch circle and cut into 8 triangles.
- Stack a slice of ham and cheese and some onion on the bottom of each triangle and roll the dough up around the filling. (Some will stick out the ends.)
- Transfer the rolls to a parchment-lined baking sheet. Bake until golden and crisp, about 20 minutes.
- Combine the mustard and oil in a medium bowl and toss with the romaine. Serve with the turnovers.
Cheddar cheese and horseradish give an ordinary roast beef wrap some bite.

INGREDIENTS
- 4 ounces cream cheese, softened
- 2 tablespoons prepared horseradish
- 4 large flour tortillas
- 1 head romaine lettuce, tough ribs removed
- 8 ounces thinly sliced deli roast beef
- 4 ounces Cheddar, thinly sliced
DIRECTIONS
- In a small bowl, combine the cream cheese and horseradish. Spread evenly over each tortilla.
- Layer the tortillas with the lettuce, roast beef, and Cheddar and roll up.
Try these on a cold winter Sunday: red pepper–flaked scones made with buttermilk and Swiss cheese.
Crispy tacos get a fresh mix of pinto beans and Cheddar.

INGREDIENTS
- 1 15-ounce can pinto beans, rinsed
- 3/4 cup mild salsa
- 1 heart of romaine
- 8 taco shells
- 1 cup shredded Cheddar
DIRECTIONS
- In a small microwave-proof bowl, combine the beans and ½ cup of the salsa. Microwave on high until hot, 1 to 2 minutes.
- Tear the lettuce into bite-size pieces.
- Divide the taco shells among 4 plates. Divide the bean mixture among the taco shells and top with the lettuce, Cheddar, and remaining ¼ cup of salsa.
Swiss cheese, eggs, and prosciutto are sandwiched together in a crisp, golden Panini.

INGREDIENTS
- 8 large eggs
- kosher salt and black pepper
- 2 tablespoons unsalted butter
- 4 soft rolls, halved lengthwise
- 8 ounces prosciutto, thinly sliced
- 8 ounces Swiss cheese, thinly sliced
DIRECTIONS
- In a small bowl, whisk together the eggs, ½ teaspoon salt, and ¼ teaspoon pepper.
- Melt 1 tablespoon of the butter in a large nonstick skillet over medium heat. Pour in the eggs and scramble until cooked through.
- Divide the eggs among the bottom halves of the rolls. Top with the prosciutto and cheese and sandwich with the tops of the rolls.
- Melt the remaining tablespoon of butter in a grill pan or large nonstick skillet over medium heat. Place two sandwiches in the pan.
- Cook, pressing often with a spatula or placing a pan on top to weigh down the sandwiches, until cheese has melted and bread is golden, 4 to 6 minutes.
- Repeat with the remaining sandwiches.
Monterey Jack melts into scrambled eggs spiced with salsa.

INGREDIENTS
- 1 1/2 tablespoons unsalted butter
- 10 eggs
- 2 tablespoons milk or water
- 1 teaspoon kosher salt
- 1/4 teaspoon freshly ground black pepper
- 1 cup shredded Monterey jack cheese
- 3/4 cup salsa (drained)
- 1 cup crushed tortilla chips
DIRECTIONS
- Heat butter in a large nonstick skillet over medium heat.
- Meanwhile, in a large bowl, whisk together the eggs, milk, 1 teaspoon kosher salt, and 1/4 teaspoon pepper. Pour into the pan and cook, stirring occasionally, to desired doneness, 4 to 5 minutes, adding cheese just before they’re set. Fold in salsa and chips.
This tangy, oozy dish is loaded with Swiss cheese.

INGREDIENTS
- 3 eggs
- 3 cups buttermilk
- 1 tablespoon fresh thyme leaves
- 2 teaspoons kosher salt
- 1/8 teaspoon freshly ground pepper
- 2 pounds baking potatoes, peeled and cut into 1/8-inch slices
- 2 pounds Granny Smith apples (unpeeled), cut into 1/8-inch slices
- 1 pound Swiss cheese, shredded
- 1/4 pound Parmesan, grated
DIRECTIONS
- Heat oven to 400° F.
- Coat a 3 1/2-quart casserole with cooking spray. In a medium bowl, whisk together the eggs, buttermilk, thyme, salt, and pepper; set aside.
- Arrange a layer of slightly overlapping potatoes in the casserole. Cover with a layer of apples and sprinkle with a third of each cheese. Pour a third of the egg mixture on top. Make 2 more layers.
- Bake, covered, 1 hour, 15 minutes. Remove cover and bake another 15 minutes or until the potatoes are tender. Remove from oven. Serve warm or at room temperature.
Everything but the kitchen sink goes into quesadillas finished off with Cheddar or Monterey Jack.

INGREDIENTS
- 1 15.5-ounce can black beans, drained
- 1 11-ounce can corn kernels, drained
- 3/4 cup salsa, drained
- 18-count package large flour tortillas
- 1 1/2 cups (6 ounces) shredded Cheddar or Monterey Jack
- 1 small red onion, thinly sliced
- 1/3 cup fresh cilantro leaves
- 1/2 teaspoon kosher salt
- 1/4 teaspoon black pepper
- juice of 1 to 2 limes
- 2 tablespoons extra-virgin olive oil
- 1 head romaine lettuce, sliced 1 inch thick
DIRECTIONS
- Heat oven to 400° F. In a medium bowl, combine the beans, corn, and salsa. Place 4 tortillas on a parchment- or foil-lined baking sheet.
- Sprinkle the tortillas with half the cheese. Using a slotted spoon, top with the bean mixture. Sprinkle with the remaining cheese; top with the remaining tortillas.
- Bake the quesadillas until the cheese has melted, 5 to 7 minutes. Transfer to a cutting board.
- Meanwhile, in a large bowl, combine the onion, cilantro, salt, pepper, lime juice, and oil. Add the lettuce and toss.
- Cut each quesadilla into 6 wedges. Serve with the salad.

