Tag: Cheese Recipe
Creating Homemade Coffee Cheese
Back in time, the coffee cheese was originally created from warm milk, straight from a reindeer and put in coffee to form a kind of snack. It was irresistible for someone of Northern Sweden and Tornedaling and can be just as mouthwatering to you!
Now, you may not have a reindeer or barn at hand, so you can just use raw milk or whole milk if you cannot get raw milk. Some of the time, you might not be able to get raw milk so pasteurized is fine to use, just be sure not to get UHT (Ultra-High Temp).

Recipe
What You Need
70 oz. of milk
2 oz. heavy cream
2 tsp liquid rennet
What To Do
First, pour the cream and milk into a large pan and heat to 99F.
Take the pan off the heat and stir in the rennet. Allow it to stand for 30-40 minutes or until the liquid has curdled.
Now stir gently with a slotted spoon while heating up the liquid to 99F again.
Once heated, spoon the cheese from the edges towards the center of the pan.
When the cheese is formed into a ball in the middle of the pan, heat it up to boiling point, but do not allow to boil. Take the pan off the heat to stop the whey boiling.
After taking the pan off the heat, place the cheese in either a large strainer, colander or even a cheese mold if you have one.
Be sure to press out the whey as much as possible from the cheese. Place a weight over the cheese and leave for a few hours so the remaining whey can be pressed out and the cheese dries up.
Preheat the oven to 392F and press the cheese into a greased casserole dish. Now bake the cheese into the center of the oven until it is browned.
You don’t have to bake the cheese, but it tastes a lot better when baked.
If the edges of the cheese become hard, you can just wrap it in aluminum foil afterward to soften them up.
There are many uses for the whey which is drained, for instance, using it to bake soft bread.
When the cheese is cooled, cut it into small squares, put some in a coffee cup and fill the cup with fresh coffee. Now stir it all up and eat with a spoon. The taste is so delicious, so enjoy!
If you have any left over, package it well and freeze it.
Making Something Different: Chaource Cheese
The name of this cheese alone is interesting, not to mention its unique flavor and form. You may never have heard of it, which makes it even more worth a try on firstly pronouncing (shah-oose) and then creating it!
Chaource is a mold-ripened cheese that originates from a small village in France called Chaource. It is usually made with both raw and pasteurized cow’s milk.
The rind of these cheese is similar to Camembert and has the same texture that just melts in your mouth. It can be aged for 2 weeks to 2 months and the flavor flourishes with time.
Down below is a big recipe for around 8 blocks of cheese, but you can easily half it if you so desire.

Recipe
What You Need
2 Gallons whole milk (can be pasteurized, but not ultra-pasteurized)
1/4 Tsp Mesophilic culture
1/8 Tsp Aroma Type B
1/4 Tsp Penicilium candidum
1/16 Tsp Geotrichum candidum
2 drops Animal rennet
Cheese salt
1/4 Tsp Calcium chloride
Equipment
8 Crottin molds
Thermometer
Butter muslin
Colander
Scoop or ladle
2 Bamboo ripening mats
Ripening box
Cheese wrap
What To Do
First things first, it is important that you sanitize every piece of equipment that will be used, including the ripening box.
Now dilute 1/4 tsp calcium chloride in 1/4 cup of non-chlorinated water and add this to the milk.
Heat the milk up slowly to 77F, checking the temperature with your thermometer.
Once the milk is warmed up, sprinkle all 4 cultures onto the milk and let it hydrate for around 3 minutes.
After 3 minutes, begin to stir the cultures for about 20 seconds into the milk.
Now cover the pot with a lid and let the milk ripen for around 8 hours, making sure the temperature stays at 77F for the entire period. If you are heating the pot with water, you might have to add hot water half way through the ripening to maintain the heat.
Add 2 drops of rennet to the milk and stir it in slowly for around 10 seconds.
Now cover the pot and allow it to sit for a further 8 hours, once again keeping the heat at 77F.
After the 8 hours is up, gently put the curds into a colander with a ladle, ensuring the colander is lined with butter muslin. Make sure you do not cut the curds. If you really wanted, you could skip this step and just ladle the curds directly into the molds but it can be quite difficult to get them all in.
Once in the colander, now ladle them into the 8 molds. Keep replenishing them as the whey drains from the molds.
If you would like to speed up the process of draining the whey from the molds, you can run a knife along the inside of the molds.
When the whey is getting to the bottom of the molds, empty the box. This step is important because the environment needs to be kept as dry as possible.
Let drain for around 48 hours. If the cheese seems firm enough, turn them around and put them back into the molds for 24 hours.
48 hours later, it is time to remove the cheeses from the molds and place them on wax paper or a paper towel whilst drying off the box.
Prepare your rack in the dry box.
Get each cheese and rub a thin layer of salt onto both ends of it. Be sure to wait a few minute between each end and then put each cheese into the box until they have all been salted.
Now close the lid on the box and place it in a space of 50-55F
Make sure you flip the cheeses every day and drain any whey in the bottom of the box.
The cheese will be ready to eat after 2 weeks of being in the box. If you are wanting to age them any longer, keep them in your cave with the lid ajar and make sure you flip them every day. Once you are ready to eat them, wrap them and place in the refrigerator. They’re best served at room temperature.
Using Tartaric Acid In Cheese Making
You can usually find tartaric acid in a lot of fruits, especially tamarind, from which tartaric acid is derived from a lot of the time. It is not only a product of cheese making though, it is also a by-product of the wine making process because it is also found in grapes.
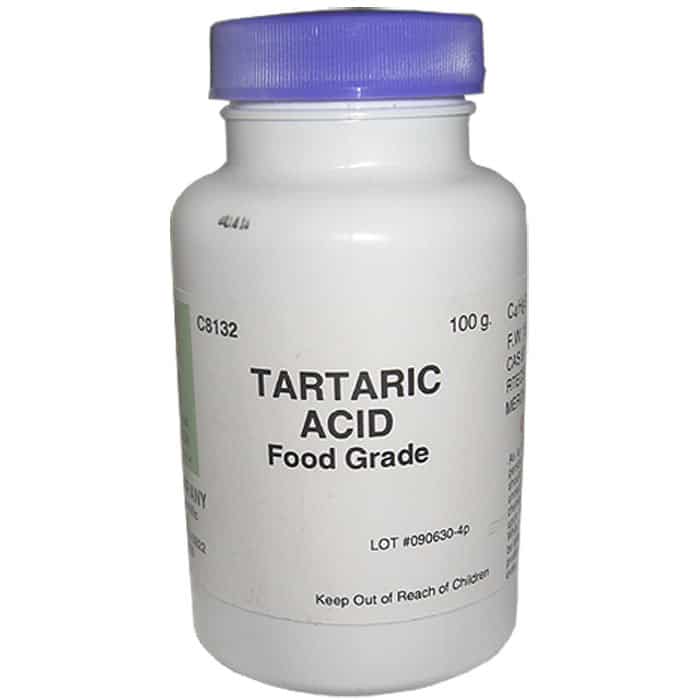
We tend to use tartaric acid in making Mascarpone as it is an easy to make cheese and very inexpensive. It is perfect for beginners because it is consistent and works well.
It takes such a small amount of tartaric acid to make Mascarpone that when you use the full 1/4 teaspoon, there is enough to create Mascarpone 95 times from a 4-ounce packet of it. (Perfect for Tiramisu lovers!)
To make around 10-12 ounces of Mascarpone, food grade tartaric acid is used. All you have to do is add 1/4 teaspoon of tartaric acid to a quart of milk and cream or around 1/8 teaspoon for if you are using raw cream.
Recipe For Mascarpone With Tartaric Acid
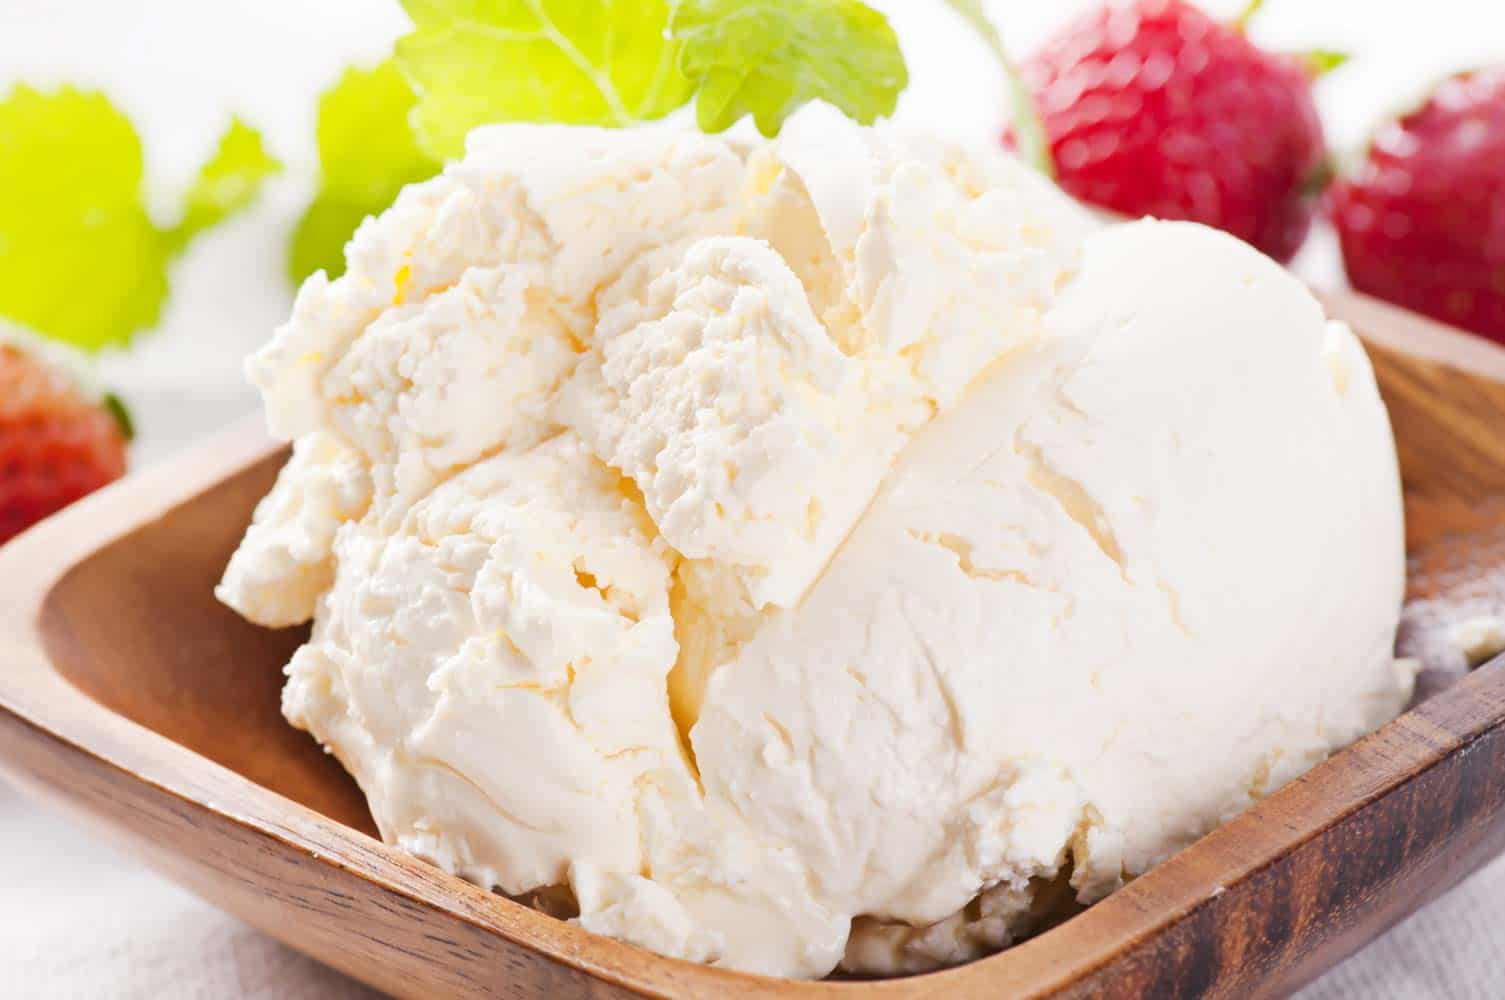
What You Need
1/8-1/4 teaspoon tartaric acid
1 quart light cream or half-and-half
What To Do
1. Heat the cream to 185F in a double boiler.
2. Add the tartaric acid and stir it into the cream for several minutes. The mixture will begin to thicken into a cream of wheat consistency, with tiny flecks of curd forming. Don’t worry if the cream doesn’t seem to coagulate, just add some more of the remaining tartaric acid and stir for another 5 minutes. Just be careful not to add too much tartaric acid, or the texture will become grainy.
3. Now line a stainless-steel colander with a double layer of butter muslin. Begin to ladle the curd into the colander and drain for an hour.
4. Once that is completed, place the finished cheese in a covered container and refrigerate for up to 2 weeks. Enjoy!
The Cheesemaking Process For Tomme au Marc
This cheese is usually found in Italy and France. Tomme is made and buried in the seeds and skins of wine making and from these skins, a liquor is also made in the name of ‘Marc’, which explains where ‘Tomme au Marc’ comes from.

What You Need
In this recipe, we use 8 gallons of milk and with that you also need:
– MA 011-Mesophilic Culture 1/8 Tsp
– TA 011-Thermophilic Culture 1/16 tsp
– Single strength Calf Rennet 11 ml (~2.25 tsp)
What To Do
To begin, heat up the milk to 91F and add the first culture and ripen for 45 minutes.
After 45 minutes, add enough rennet so it sets within 12-18 minutes and cut the curd into a small size (roughly 1/4 in.).
Now stir the mixture for around 10 minutes and slowly increase the temperature to 98F over the course of 30 minutes.
You can now continue to stir the curd until the TA% rises to .12. This will ensure that the curd is sweet but acidity will begin to develop in the molds.
Make sure you prepare the molds with warm water or whey being poured into them before transferring the curds. This will ensure clarity of the whey which means there was very little fat lost during handling.
After a few minutes of filling the molds with the curds, you can flip them and place them back into the molds. This makes the surface come together fairly quickly.
Now add around 8lbs of weight for around 30 minutes. After those 30 minutes, flip and place the molds again, making sure the temperature stays at a range of 90-95F to help the culture do its job.
Add around 25lbs of weight for 4-6 hrs. After this period, the surface should have formed really well and the acid will be developing nicely to a pH of 5.6
You can now leave the cheese to develop mold overnight and the pH should have lowered to around 5.3 in the morning.
It is time to brine your cheese for around 12 hours. The choice of brine is yours and after it is completed, take your cheese to the aging room and leave it for a week or so to allow the surface to firm up a lot more.
After a week or two, the tommes are ready to be buried in the Marc and anointed with a delightful splash of merlot.
Seal the top off and put it to rest in a cool room at a temperature or around 50-60F for at least 2 months before you take it out.
Once this is done, the tomme will be bursting with skins and seeds embedded within it. Keep them on the cheese and allow the tomme to dry out for a few more days, making the surface quite soft at this stage.
All this work is definitely worth it, the complexity of this cheese is perfection. The flavor of the wine and skins being a key aspect of the flavor and texture profiles. Enjoy!
Have You Ever Tried Brie Pie?
This rich and luxurious pie is not your average pie. In fact, pies in the U.S are usually eaten for dessert, but Brie pie is more of an appetizer or entree.
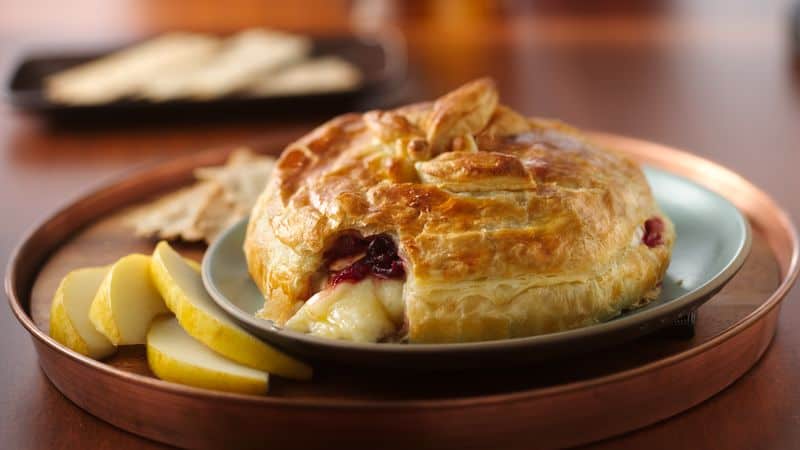
Luckily, like a lot of the delicious appetizers on offer, this one is fairly simple to create and has an amazing payoff. It may look quite difficult, but it only entails wrapping a wheel of brie in a thawed sheet of puff pastry and cooking it until golden. Even if it was difficult to create, the combination of warm melted cheese inside of a crispy pastry is impossible to resist and worth every effort.
The type of Brie you get isn’t too important, a rule of thumb would be to buy one that fits your hand and looks good to wrap in pastry.
Let’s get right to it and create this cheesy masterpiece!
Recipe
What You Need
8 oz of Brie
1 sheet puff pastry, thawed
All-purpose flour
1 large egg, beaten
What To Do
Firstly, preheat oven to 400 F, making sure the oven rack is in the middle of the oven. Now line a baking sheet with parchment and set it aside.
Start by rolling out the puff pastry, using the flour to dust out on the counter and then sprinkle some more flour on top to the pastry to aid rolling further. Roll the pastry so that it measures around 11 x 11 inches to make sure it fits around the Brie.
Now it is time to wrap the brie in pastry. Place the wheel of brie in the middle of the pastry and fold the corners over the brie, creating a neat package. Press against the edges gently and neaten the sides up.
Brush the pastry over with the beaten egg, making sure you get the sides and transfer the pie to the baking sheet.
Bake the pie for around 35-40 minutes or until golden brown.
Now allow cooling for 5 to 10 minutes which will give the hot cheese time to firm up.
Transfer it to a serving platter and serve it warm.
Things To Know About Dairy Free Vegan Cheese : Healthy Diet
The whole term ‘vegan cheese’ sounds like a contradiction in itself. You might be wondering how a vegan can eat something made from milk when they are thoroughly against eating any product that comes from an animal. Well, there are actual non-dairy cheeses on the market, as opposed to cows’ or goats’ cheese. However, choosing non-dairy cheese requires care and attention.
Be Cautious
A lot of dairy cheeses are made using rennet, which is the process of extracting an enzyme from the stomach of a calf. Although vegan and vegetarian cheeses are made without rennet, some cheeses which are suitable for vegetarianism, including some made from soy milk, can still contain casein or calcium caseinate which is milk protein to give texture to cheeses. The best way to be completely sure you are avoiding animal products, read the ingredients thoroughly and look for the logo from the Vegan Society.
A good range of vegan cheeses are available and the choice is forever growing as more and more people decide, for ethical and health reasons, to give up dairy food and opt for a vegetarian or vegan lifestyle. That being said though, vegan cheese can be hard to find in just your small local grocery store. The best places to look are specialist cheese shops or big grocery stores. You should also ask because if the demand is great enough, it will have to be met.
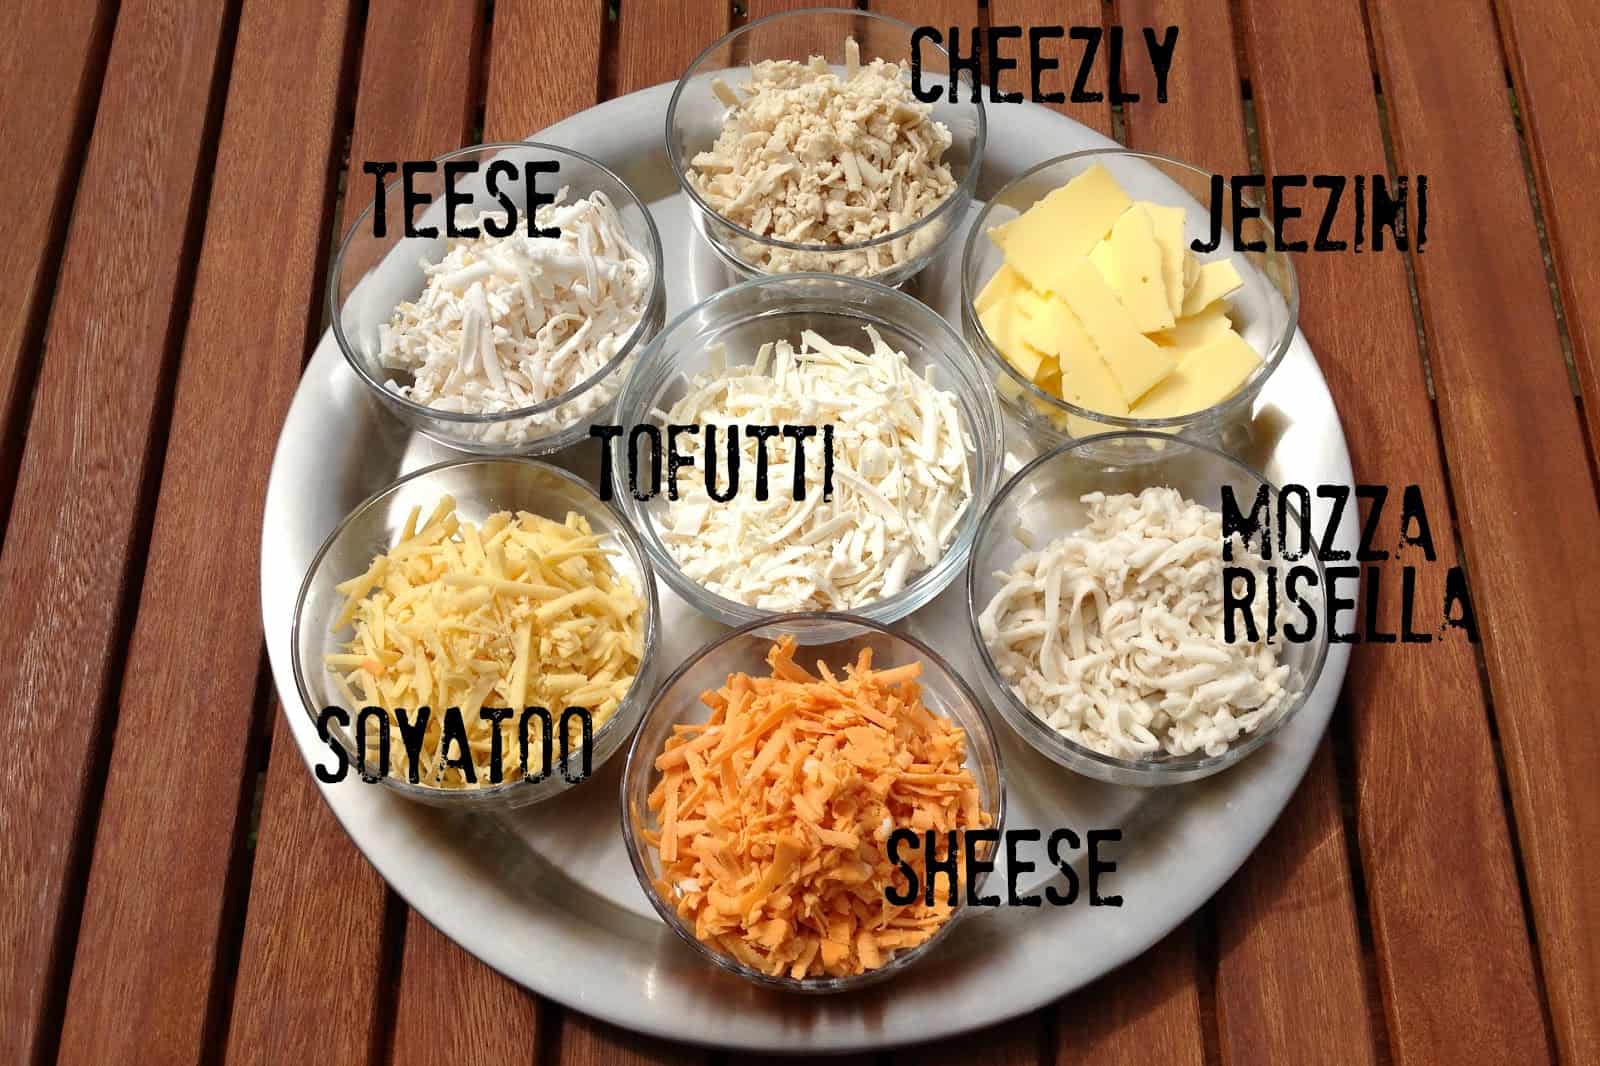
A few helpful names to remember when searching for tasty vegan cheese are Tofutti, Cheezly, and Scheese. All of which can be found in store or ordered online. There are plenty of useful websites and books that will contain all the information on where to get the best, certified vegan cheeses as well.
How To Use Vegan Cheese
Vegan cheese can come in soft or hard form and different styles just like regular dairy cheese. You can grate, slice, spread or use as a pizza topping, the only difference to dairy cheese is that the properties are slightly different. Most vegan cheese can be used to replace dairy cheese in traditional recipes. The best thing to do is try them out yourself and find your favorites and them go ahead and begin incorporating them into meals.
Yeast Flakes
Something very valuable to a vegan’s diet is nutritional yeast flakes. They help provide essential nutrients along with the important cheesy taste to many dishes. The flakes are yellow (not to be confused with brewer’s yeast) and can be sprinkled onto mashed potato, for example, to give the cheesy topping desired for your casserole. These flakes are available from healthy food stores or on the internet.
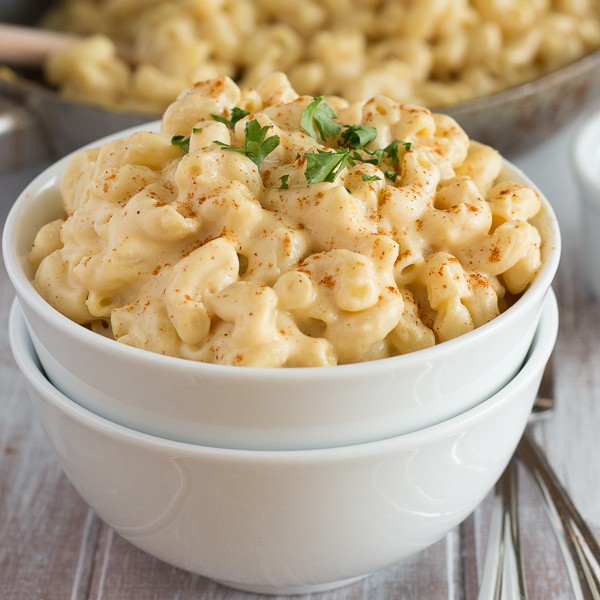
A Tasty Recipe Example of America’s Beloved Macaroni ‘Cheese’
What You Need
3 cups macaroni
½ cup vegan butter
½ cup plain flour
3½ cups boiling water
1½ teaspoons salt
1½ teaspoons garlic powder
Pinch turmeric
2 tablespoons dark soy sauce
¼ cup oil
1 cup nutritional yeast flakes
Paprika
What To Do
Pre-heat the oven to 375 degrees F
Cook macaroni as instructed on the packet, drain and set aside.
Melt the butter, stir in flour and mix over low heat until you have a smooth paste. Mix in garlic powder, turmeric, and soy sauce with the boiling water and gradually add to pan, stirring constantly until you have a smooth liquid. Return to heat and bring to a boil, stirring. Remove from heat and whisk in the oil and yeast flakes.
Place macaroni in ovenproof dish. Stir in most of the sauce. Pour remaining on top and sprinkle with paprika. Cook for 15 minutes.
The Creamiest, Dreamiest Mac ‘N’ Cheese On Earth!
Mac ‘n’ cheese is an American staple! It is one of the most convenient, but tastiest foods you can make, pleasing all ages. Unfortunately, we are often disappointed with premade mac ‘n’ cheese, with it being too bland or worse- dry and gritty; when all we really want is fluffy pasta, smothered in a creamy, velvety cheese sauce, not forgetting the light, but perfect, crunchy topping. We want the type of mac ‘n’ cheese that is so good that we are scared to start eating it, in fear we might not stop!
Here are some top tips on creating the creamiest, dreamiest mac ‘n’ cheese you can find:

Image Source: brightcove.vo.llnwd.net/d21/unsecured/media/1033249144001/1033249144001_1836401082001_ari-origin05-arc-186-1347475591144.jpg?pubId=1033249144001
1. Classic Cheddar Is The Way To Go!
A lot of recipes or premade packages of mac ‘n’ cheese call for lots of different fancy cheeses and multiple kinds of cheese in general. It seems to take away the classic flavor of what mac ‘n’ cheese actually is- sometimes, simple is better! Classic mac ‘n’ cheese usually uses a simple, but tasty cheese like cheddar. Cheddar gives back the iconic taste of macaroni and cheese, along with a hint of parmesan. The parm combines with the cheddar, giving it a nutty flavor, but working well with the cheddar instead of distracting its flavor. It is also recommended you shred your own cheese as well, as there are usually added things that make ready-shredded cheese drier with less flavor.
2. Add Cream For A Super Rich Sauce
This is quite possibly one of the most important stages to ensure the creamiest mac ‘n’ cheese. It is common to add a basic white sauce such as béchamel. However, béchamel doesn’t really give the creaminess we are looking for- but milk and cream does! Trying a combination of milk and cream will change your life! It adds such an indulgent texture, making your mouth water with every bite. Whisking your cheese throughout the process is another recommendation, it will ensure the cheesiest sauce possible.
3. Add A Dash Of Mustard Powder
It may seem unusual to be adding mustard to mac ‘n’ cheese, but it really boosts the flavor, all while staying undetectable! You can use a number of spices when making this dish, but mustard powder gives that perfect, mouthwatering addition that is needed to bring out the cheddar in the best way possible.
4. Using Garlic Breadcrumbs For That Extra Burst Of Flavor!
Adding that extra layer to the top of our mac ‘n’ cheese gives us this extra amazing flavor with the light and crunchy texture needed. Many just use plain breadcrumbs, but using garlic breadcrumbs will infuse the flavor like no other.
5. A Simple, But Easily Missed Trick
This step is easily forgotten, but so important- seasoning your mac ‘n’ cheese. Seasoning in three steps will ensure the right amount of seasoning all throughout your dish and gives it just the right amount of kick. It is always best to add your seasoning (such as salt and pepper) while making the topping, the sauce, and the macaroni.
You may love to add extras such as bacon or lobster, but this creamy macaroni and cheese alone is more than enough! It simply melts in your mouth.
The Best Ways To Each Cheese: Part 1
Who doesn’t like eating cheese? As a culture with a strong, burning passion for food, at or near the top of this list, we often find cheese. Cheese is an overlooked, and often underappreciated food. In can be integrated into countless dishes, or it can be used as a topper for so many more dishes, salads and even desserts. We, as a civilization, never seem to run out of ideas for our uses of cheese. Every day, it seems that culinary experts and chefs around the world are experimenting with different cheeses and dishes in their efforts to create new dishes whose main attraction is cheese, in some way, shape or form.
Let’s taker a gander at some of the more ingenious creations in which cheese is used, or hidden, for that matter. Now, keep in mind, some of these dishes or cheese concealments require a “think outside of the box” approach…
Cheese-stuffed Meatballs
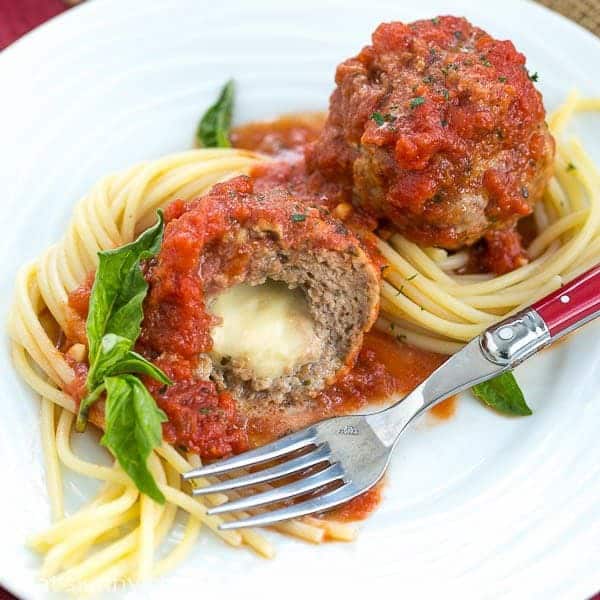
When making meatballs, add some “umpf” to it by integrated some of your favorite cheese when rolling the meat to form meatballs. As the cheese meets the heat when cooking, the cheese will expand and will add an extraordinary flavor to an already delicious meatball.
___________________________________________________________
Ham, Egg and Cheese Crepe
- Make your pancake, as you normally would… the thinner, the better in the case of this recipe.
- When the underside is nearly cooked, place a slice of ham on top, topped off with some of your favorite cheese.
- Fold the sides into to make a square, or as close as you can get to one.
- Break your egg into the space left… leave sunny-side up.
- Squish the sides down with your spatula to seal as the cheese melts.
- Cook for 3 or 4 minutes until the egg is turning white.
- Pop under the grill for a further 2 or 3 minutes until the yolk is just starting to cook, or however you like it. (Although, if you like it any way other than runny you’re way crazy.)
Source: http://www.tamingtwins.com/ham-egg-and-cheese-crepes/
____________________________________________________________
A Cheesy Pie Crust… literally
Making a pie crust with cheddar cheese baked directly into the crust gives it an entirely new dimension of flavor. Try baking an Apple Pie with a cheddar cheese infused crust. Goodness, that sounds absolutely amazing just thinking about it.
_____________________________________________________________
For the Gluten-Free
For those who are in search of gluten-free foods, try using cheese as bread crumbs over zucchini. If this peaks your interest, try this recipe for starters… Parmesan Baked Zucchini.
INGREDIENTS:
- 4 zucchini, quartered lengthwise
- 1/2 cup freshly grated Parmesan
- 1/2 teaspoon dried Thyme
- 1/2 teaspoon dried Oregano
- 1/2 teaspoon dried Basil
- 1/4 teaspoon Garlic Powder
- Kosher salt and freshly ground black pepper, to taste
- 2 tablespoons Olive Oil
- 2 tablespoon chopped fresh Parsley leaves
DIRECTIONS:
- Preheat oven to 350°F. Coat a cooling rack with a nonstick spray such as Crisco and place on a baking sheet.
- In a bowl, combine the following: Parmesan, Thyme, Oregano, Basil, Garlic Powder, salt and pepper. Taste to determine if this meets desired taste.
- Place the quartered zucchini onto prepared baking sheet. Sprinkle olive oil and as well as Parmesan mixture.
- Place into oven and bake until tender. This usually takes ~ 15 minutes. Then broil for around 2-3 minutes, or until crisp and golden brown.
- Serve immediately. Garnished if that is your thing…
Source: http://damndelicious.net/2014/06/21/baked-parmesan-zucchini/
___________________________________________________________
Cheese-Infused Loaf of Bread
This is quite the old-fashioned move, but as they say, “an oldie but goodie” and this no doubt falls in this league. When baking a loaf of bread, step up your culinary game and inject a concoction into the center of the bread; a concoction of your favorite cheese, spices, herbs, etc. Bake and enjoy!
____________________________________________________________
More Cheese… More Bread
With the Cheese-Infused Bread in the back of your mind, try this cheese creation on for size. The Bread Bowl of Cheese is another cheese creation, or should I say, masterpiece, that is in yet another league of its own. Try this recipe…
INGREDIENTS
- 4 bread rolls (soft or crusty)
- 4 small slices of ham, or 2 big ones cut in half
- 4 eggs, at room temperature
- ½ cup shredded mozzarella cheese
- 1 tbsp fresh parsley, finely chopped (optional)
INSTRUCTIONS
- Preheat oven to 350°F.
- Cut tops off the bread rolls.
- Scoop out the center of each bread roll and reserve. Although this can be quite an intricate step in the overall recipe, try to keep your cuts and scoops nice and neat.
- Line the bread bowl with a layer of ham, using a single slice or multiple slices as needed.
- Crack in an egg. This is the part of the recipe where Humpty Dumpty came to mind with me.
- Top each with 2 tablespoons of Mozzarella and a sprinkle of parsley, if desired.
- Put the tops back on each roll. Wrap with foil and place in oven to bake for ~10 to 15 minutes, making certain to check periodically, ideally, in 10 minute intervals.
- 10 minutes = very runny yolks. 15 minutes = firm just cooked yolks. 15 minutes + = very cooked yolks.
- Remove from oven, unwrap, serve immediately and enjoy heaven in a bowl.
What is the Perfect Cheese For Pizza?
September 5th marked a day of celebration for America, and perhaps, even much of the world… because who doesn’t like pizza and cheese or both? Unknown to many is that September 5th is National Cheese Pizza Day. You know with the birth of smartphones and mobile apps came the phrase “…there’s an app for that”, well in similar light, if you love a food or, in this case, a combination of foods, a new axiom may take shape here, “…there might just be ‘National’ day for that”. A day that puts the focus of pizza and cheese, two delicious foods in and of themselves, but when together, spark a whole new revelation of culinary marvel… who would not love a day just to celebrate such a marvel? The answer should be simple… no one.
There has been an age-old question that continues to make the mind wonder and wander, that is… “Is there a perfect cheese to put on pizza?” Dr. Bryony James, a scientist whose research centers on food microstructure and food material science in New Zealand at the University of Auckland dove right in to find an answer the this question. Dr. James’ team of scientists study the building blocks of food and even experiment with structural composition of various foods that can influence its functionality. Ideally, their line of scientific research would allow them to develop a potential hypothesis for such an experiment. As the team began initial studies of the “best cheese for pizza”, they already knew that, historically, Mozzarella was highly favored and the most commonly used cheese for pizza topping.
Among countless scientific trials and experiments, the team researched cheese based on browning and blistering. These variable were designated as focuses of research as they were found to be the most looked upon features by consumers. Examining the properties, features and characteristics of cheese could potentially lead to further discoveries of the ideal cheese or in some cases, the ideal combination of cheeses to use on pizza. Other cheeses the group extended their research to was Cheddar, Colby, Emmental, Gruyere and Provolone. The actual experimentation itself was conducted by state-of-the-art technology, as opposed to human hands. As human judgment would have been idea over the work of a machine, it would have been far more time-consuming and brought the idea of a “bias” trial or opinions when bringing human emotion and interaction into the picture.
Of the properties of cheese that were measured for this experiment, smell, texture, melting properties and color were at the forefront. Researched revealed that some cheeses like Cheddar did not produce a favorable level of blistering while the likes of Gruyere did not properly brown after melting, which can be attributed to the oil content within the cheese. The results clearly indicated that although Mozzarella might be the traditional favorite cheese topper for pizzas, there might not be that “perfect” cheese or combination of cheeses, as each cheese’s characteristics and properties, when undergoing melting, might be desirable for one consumer, but desirable for another.
Source: http://www.cheeserank.com/post/the-science-of-pizza-cheese
Is Cheesecake Made From Real Cheese?
You are at your favorite restaurant and you order something off the dessert menu. None other than universal go-to and favorite, cheesecake. Then you begin thinking to yourself, why do they call it cheesecake when the main ingredient in the cheesecake is cream cheese? Why not call it Cream Cheesecake? Well, truth be told, while some use cream cheese to make cheesecake, many other parts of the world use actual cheese to create this one-of-a-kind dessert masterpiece. There are actual a number of cheeses that different parts of the world use to make their own version of [real] cheese cake.

Cream Cheese
Cream cheese was first created in the 19th century across the United States. Having many styles and variance, cream cheese was first made my local dairy farmers in Philadelphia, Pennsylvania. Later, in the 19th century, William A. Lawrence, a Chester, New York dairyman bought a Neufchâtel factory. Neufchâtel is a softer cheese that is native from France for centuries. Lawrence, however, decided to take an additional step by adding more cream during the Neufchâtel-making process causing the cheese to become richer and heavier. He termed this “cream cheese”, and how fitting the name was. The majority of cheese cakes across North America are made with the base of some type of cream cheese giving “typical” cheese cake that rich, creamy texture.
Sour Cream
Seriously?? While sour cream is not a cheese, it is a dairy byproduct of fermenting cream. Because of its smoothness and creaminess, it is often added to the cream cheese base that is used in cheese cake to make it creamier and thicker. Yet, other renditions of the dessert may feature a strictly-cream cheese base with a sweet, sour cream topping, usually in plain form or with lemon shards adding an extra bite or or layer of flavor.
Quark
Across various parts regions of Europe, quark is the go-to ingredient when making cheese cake. Because it is native to parts of Europe, cheese cake made from quark is often termed “German-style” or “Bavarian” cheesecake. Like Sour Cream, quark is made from the fermentation of milk. It has a creamy and yet a bit crumbly in texture and often has curds. Unlike cottage cheese, also having curds, quark is not made with rennet (as cottage cheese is) and salt, at times.
Ricotta
Here we have the real deal. I, personally, have had cheesecake made with Ricotta and I can tell you that it is the best cheesecake I have ever had. Besides its most common use in Lasagna and Manicotti, Ricotta is used to make cheesecake. While it is made in the United States as well, it is referred to as “Ricotta Pie” here in the states. Other versions of Italian cheesecake might use Mascarpone, a very soft Italian cheese often used in Tiramisu.

