Category: Favorite Recipes
Don’t Let Your Leftover Wine Go To Waste! Make Cookies!
Got leftover wine from a dinner party or special occasion? It may daunt you the thought of drinking that bottle alone but you really don’t want to throw it away. Well, do not worry! The Italians have an amazing use for leftover wine: bake with it!

Image Source: drizly.com/blog//
Gather some of the ingredients you already have in your pantry and use your leftover wine alongside it to make these simple but tasty Italian wine cookies.
These cookies originally came from the south of Rome, having a long history of being passed down through generations. It is quite a basic recipe, the dough being quite simple, to suit any Roman family, rich or poor. All they needed were wine, sugar, oil, salt and flour.
Another plus to this recipe aside from using up your leftover wine is that it works with any kind of dry wine, red or white, the only difference will be in flavor, but only slight.
These cookies aren’t full of sugar either, so if you’re on a health kick, they won’t be too bad! They’re donut-shaped and are more like biscuits. You can enjoy them as a snack or dip them in milk or coffee, as the Italians would do.

Image Source: cbc.ca/inthekitchen/2012/10/anise-wine-cookies.html
Recipe:
What You Will Need-
1/2 cup dry white or red wine
1/2 cup seed or canola oil
1/2 cup sugar
1/4 teaspoon salt
2 cups all-purpose flour
What To Do
1. Preheat oven to 350 degrees
2. Mix wine, oil, sugar, and salt in a mixing bowl
3. Add the flour gradually, while stirring to combine until it forms into a dough and starts to hold its shape. Knead with hands if needed.
4. Roll 1/2-inch balls of the dough into a snake-shaped cylinder and then connect the ends, making a donut shape.
5. (Optional) You can then dip or sprinkle with extra sugar if you want them to be sweeter.
6. Place the cookies on an ungreased baking sheet and bake for 20-25 minutes, or until lightly browned.
The Wonderfully, Unique Cheeses Available At Shisler’s Cheese House!
Our fantastic Cheese House originally opened in 1958. Since then, we have come a long way and perfected our cheese to a high standard. The 2 main goals of our Cheese House have always been to provide wonderful local cheeses and gourmet foods to everyone, along with exceptional and friendly customer service.

We are currently owned and operated by the third generation of Shislers. We have 2 locations, the original being in Orrville, OH and the second being in Copley, OH. Because of our dedication of cheese and gourmet foods, we ship all throughout the United States and to over 30 different countries!
We have a wide selection of cheese, to your staple cheeses such as American Cheese and Swiss, to our more specialized, unique blends which we would love for you to try!
Here are some of our specialty cheeses:
Hot Pepper Cheese

Want to spice up your cheese plates? We have just the right cheese for the job! Our Hot Pepper Cheese has just the right amount of heat to make a perfect balance of flavor with a little extra kick! You have to try it to believe it!
Green Onion Cheese

We love to support local businesses and that doesn’t change when it comes to our cheese! Our Green Onion Cheese is made with all-natural 100% Ohio farm milk and real green onion. It contains no artificial growth hormones and is pasteurized processed cheese.
Bacon Cheese

Everyone loves bacon! Bacon and cheese make many appearances together in well-known dishes such as Chicken, Bacon Pasta Bakes, Salads, Casseroles and much more. It only made sense to make a Bacon Cheese! This cheese is mild orange cheddar which is infused with smoked bacon.
Beer Cheese

Beer Cheese is one of our Wisconsin Cheeses along with Brick, Muenster, Limburger and our American Cheeses. Our Beer Cheese is not to be mistaken for the popular Beer Cheese dips of Kentucky, it is a semi-soft combination of Limburger and Brick Cheese. The taste and smell are very strong and can be enjoyed with a nice cold glass of beer.
Chocolate Cheese

This cheese is one way to get the best of both worlds! Our Chocolate Cheese is made from a local recipe and all the ingredients are locally produced, combining fine chocolate fudge with premium cream cheese. This makes for a smooth, creamy balance of sweet chocolate and mild cheese!
These 5 kinds of cheeses are must try cheeses! Don’t hesitate, trust our family of cheese experts at Shisler’s Cheese House, and you won’t regret it!
Order your quality, affordable, delicious cheeses today at-https://cheesehouse.com/cheese.aspx
Barley Bread Is Not Only Tasty But…
A study in Sweden found that not only is barley bread healthy for us, but it can actually cut the risk of diabetes and obesity.

Image Source: healthadel.com/wp-content/uploads/2010/07/diabetes.jpg
The study involved middle-aged participants being asked to eat bread made from 85% barley for breakfast, lunch, and dinner. Around 11-14 hours after the last meal of that day, they were then examined for diabetes and cardiovascular disease risk indicators.
It found that a special mix of dietary fibers improved the person’s metabolism for up to 14 hours. Not only that, but it also decreased the blood sugar and insulin levels, making insulin sensitivity increased, it also increased appetite control. The bread was also found to help regulate the growth of healthy gut bacteria.
So now we know all the benefits to this delicious bread, spice up your meal times with this Barley Bread Recipe, while also keeping it healthy:
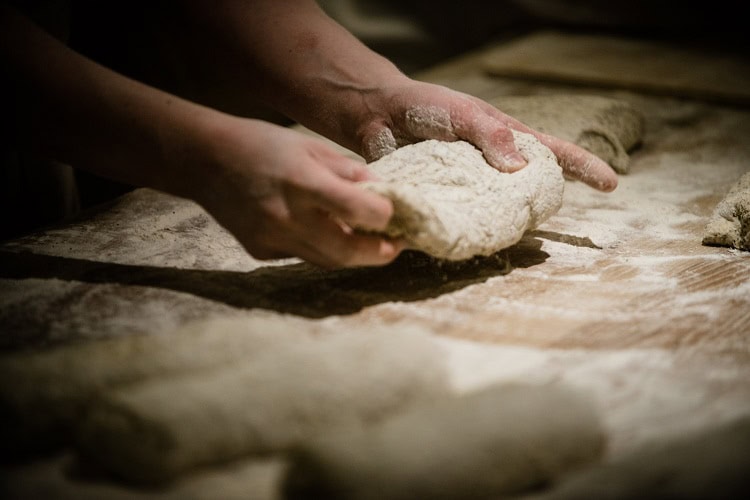

Image Source: eataly.com/wp/wp-content/uploads/2015/08/20130422_eataly_FSP9551_1500_q70.jpg
What You Need:
– 10 ounces barley flour
– 1 teaspoon kosher salt
– 1-ounce baking powder
– 2 tablespoons honey
– 1/4 cup canola oil, plus extra for greasing the pan
– 2 eggs
– 1 cup whole milk
What To Do:
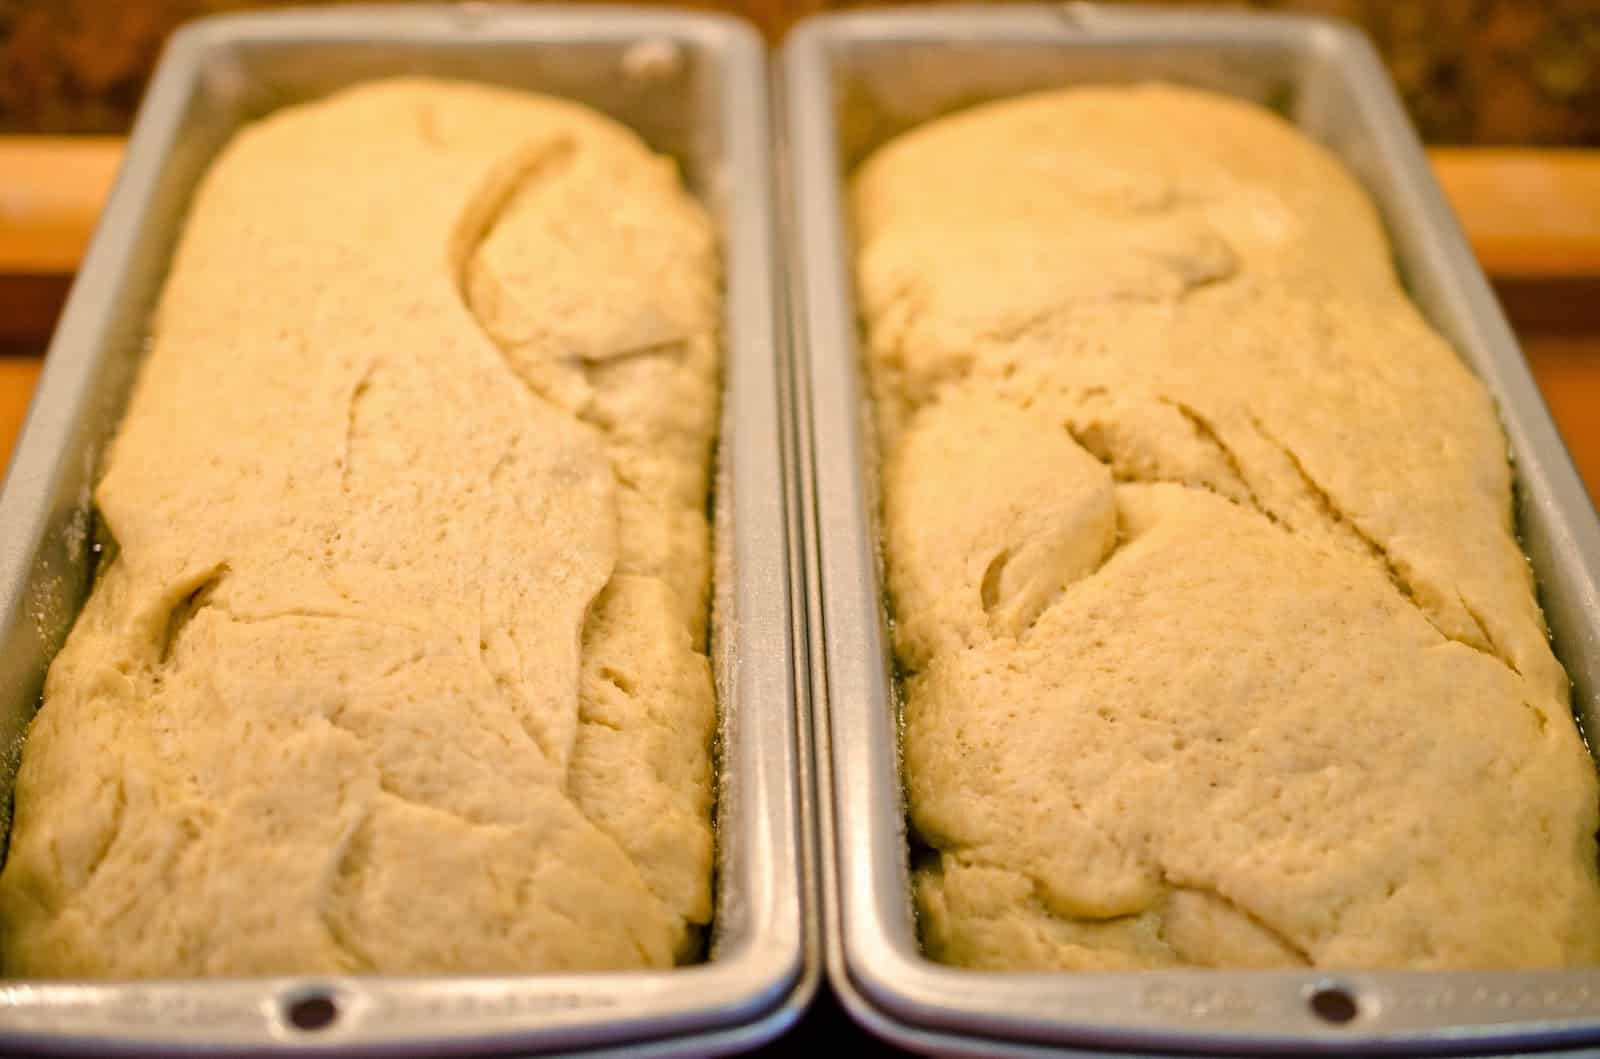

Image Source: 4.bp.blogspot.com/-ZzSTxFU5Hpk/VH9to0_ku6I/AAAAAAAANAk/1r5x2_JFulQ/s1600/BarleyBread010.jpg
First, preheat the gas grill on low heat for at least 10 minutes
Then, lightly grease the sides and bottom of a 4 to 5-quart dutch oven with canola oil.
In a mixing bowl, mix together the flour, salt, and baking powder. Then in another mixing bowl, whisk together the honey, oil, eggs and milk. Add the wet and dry mixed ingredients together.
Pour the batter into the dutch oven, not covering with a lid. Then place the dutch oven on the grill and close the lid of the grill.
Cook with the lid closed for 35-40 minutes, or until the internal temperature reaches 190 degrees F.
Allow to cool off in the dutch oven for at least 5 minutes before putting on a cooling rack.
If you are baking in a traditional oven, bake at 350 degrees F for 25-30 minutes or until it reaches 190 degrees F.
And enjoy!

Image Source: bakeryandsnacks.com
The Answer Is Feta
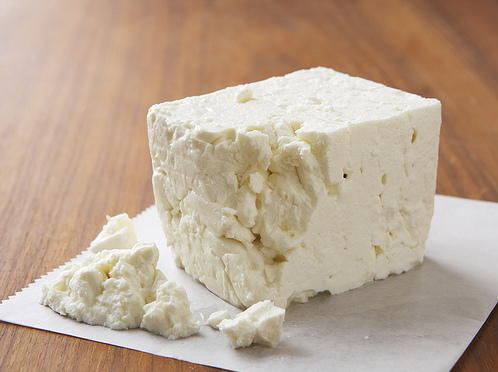

Image Source: irepo.primecp.com/2016/03/257238/recipe-1641_Large500_ID-1435983.jpg?v=1435983
Soaking chicken overnight in brine is an age-old technique. Brining a chicken seasons it through and through, locking in the moisture for tender meat.
However, unless you work in a Greek restaurant, going through 600 pounds of feta cheese a month, you probably won’t think to use feta as brine instead of plain salt water. At the Greek restaurant Souvla in San Francisco, that’s exactly what they did!

Image Source: 476343dd60686491a262-192409bd95508847c5120d21ffc8ab86.ssl.cf2.rackcdn.com/admin/uploads/transforms/20151023095545_576_13_704x388.jpg
The process of creating a feta brine involves the actual salt water liquid that preserves the cheese during storage. With going through so much feta cheese a month, the restaurant also went through a lot of the salt water solution that was used to store their feta. They were simply tired of seeing so much brine go to waste.
The brine is a lot more complex than salt water and has a fermented pickled flavor, along with an umami character which the restaurant knew could be repurposed. With that, Mr. Cervone came up with the brilliant idea to use the brine on the rotisserie chickens, which were served at the restaurant and sold as takeout. Not only did it make the chicken even more plump and juicy, it also added a pleasant earthiness to the meat. It also sparked immense popularity at the restaurant with how delicious the chicken is and now every night they go on sale, they are sold out very quickly!
Now although you may not have the commercially used feta brine, you can actually purée feta cheese in water and use that in its place. You marinate your chicken in the mix and store it overnight in the fridge. The following day, pat the chicken dry, cover it with lots of grated lemon zest, freshly ground black pepper, and dried oregano. You then roast it how you would any chicken and let your senses burst with this juicy, feta infused chicken!

Image Source: finecooking.com/CMS/uploadedImages/Images/Cooking/Articles/Issues_91-100/051100074-03-how-to-make-feta_ld.jpg
A Traditional St. Patrick’s Day Meal
Whether you enjoy dressing up in all green, enjoying the family festivities or getting absolutely wasted until the early hours, the most central part of any holiday is a great dinner – and a hearty, Irish meal is so important on St. Patrick’s day.
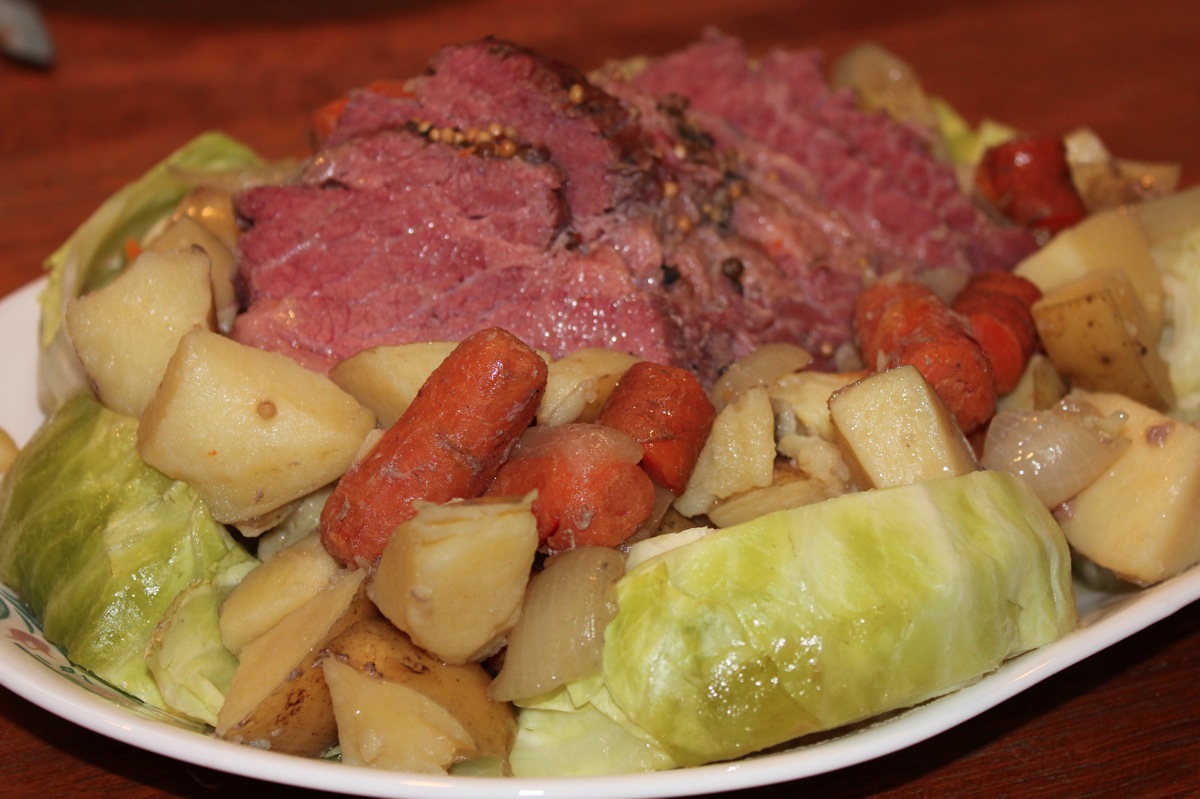

Image Source: noexcusesbbq.com/wp-content/uploads/2012/03/IMG_1920.jpg
Corned Beef Brisket, Cabbage, Potatoes, And Carrots
This incredible dish takes a whopping 10 hours to cook- but is so worth it! Back when St. Patrick’s day became a tradition, you might’ve found families corning their own beef, but nowadays there is absolutely nothing wrong with a delicious store-bought corned beef brisket. Like any holiday, getting up super early just to start cooking is a tradition- and this beef brisket definitely follows through on that tradition, cooking for 10 hours to ensure mouthwatering, tender, moist meat. Not only does it need to cook for 10 hours, you ideally need to let it cool for a day in its cooking liquid to ensure even more amazing flavor. Carrots, cabbage, and potatoes compliment this delicious hunk of meat perfectly, making every juicy mouthful a delight.
Champ
These mashed potatoes are definitely a dish for ‘champs’. Unlike normal mashed potatoes, champs are much creamier and are scallion-studded. They are enriched with milk and butter and are seasoned with salt and pepper, with finely sliced scallions added. The flavor is rich and extra zesty.
Stout-Battered Onion Rings
Onion rings may not be traditional to Irish culture, but stout definitely rings it in. Stout-battered onion rings are rich in flavor, with hints of paprika, honey, and mustard for spice and sweetness. These aren’t your typical onion rings- they are a special type, bursting with flavor, perfect for the special day of St. Patrick’s Day.
Soda Bread
Soda bread is a very traditional bread of the Irish, so it makes sense to enjoy it on St. Patrick’s Day! Soda bread is so dense and crumby and uses baking soda for leavening. It is also enriched with buttermilk and sweetened with honey. As opposed to the more traditional soaked raisins, using cranberries can be refreshing, along with it being studded with whiskey. If you aren’t a fan of Soda Bread, another option could be nutty Irish brown bread to accompany the meal.
Irish Coffee Ice Cream With Dark Chocolate and Pecans

Image Source: seriouseats.com/recipes/assets_c/2010/12/20101221-129824-coffee-caramel-ice-cream-thumb-625xauto-129798.jpg
There’s nothing that tops off a meal better than some ice cream, but even better, Irish ice cream on St. Patrick’s Day! This delicious dessert is bursting with buttery caramel, roasted coffee grounds and not forgetting the generous portion of Irish Whiskey! Its flavor is creamy and sweet, with a slight bitterness and smokiness to it, really complementing the other flavors. The dessert is finished off with crunchy candied pecans and shaved dark chocolate- because who doesn’t like chocolate?
The Creamiest, Dreamiest Mac ‘N’ Cheese On Earth!
Mac ‘n’ cheese is an American staple! It is one of the most convenient, but tastiest foods you can make, pleasing all ages. Unfortunately, we are often disappointed with premade mac ‘n’ cheese, with it being too bland or worse- dry and gritty; when all we really want is fluffy pasta, smothered in a creamy, velvety cheese sauce, not forgetting the light, but perfect, crunchy topping. We want the type of mac ‘n’ cheese that is so good that we are scared to start eating it, in fear we might not stop!
Here are some top tips on creating the creamiest, dreamiest mac ‘n’ cheese you can find:


Image Source: brightcove.vo.llnwd.net/d21/unsecured/media/1033249144001/1033249144001_1836401082001_ari-origin05-arc-186-1347475591144.jpg?pubId=1033249144001
1. Classic Cheddar Is The Way To Go!
A lot of recipes or premade packages of mac ‘n’ cheese call for lots of different fancy cheeses and multiple kinds of cheese in general. It seems to take away the classic flavor of what mac ‘n’ cheese actually is- sometimes, simple is better! Classic mac ‘n’ cheese usually uses a simple, but tasty cheese like cheddar. Cheddar gives back the iconic taste of macaroni and cheese, along with a hint of parmesan. The parm combines with the cheddar, giving it a nutty flavor, but working well with the cheddar instead of distracting its flavor. It is also recommended you shred your own cheese as well, as there are usually added things that make ready-shredded cheese drier with less flavor.
2. Add Cream For A Super Rich Sauce
This is quite possibly one of the most important stages to ensure the creamiest mac ‘n’ cheese. It is common to add a basic white sauce such as béchamel. However, béchamel doesn’t really give the creaminess we are looking for- but milk and cream does! Trying a combination of milk and cream will change your life! It adds such an indulgent texture, making your mouth water with every bite. Whisking your cheese throughout the process is another recommendation, it will ensure the cheesiest sauce possible.
3. Add A Dash Of Mustard Powder
It may seem unusual to be adding mustard to mac ‘n’ cheese, but it really boosts the flavor, all while staying undetectable! You can use a number of spices when making this dish, but mustard powder gives that perfect, mouthwatering addition that is needed to bring out the cheddar in the best way possible.
4. Using Garlic Breadcrumbs For That Extra Burst Of Flavor!
Adding that extra layer to the top of our mac ‘n’ cheese gives us this extra amazing flavor with the light and crunchy texture needed. Many just use plain breadcrumbs, but using garlic breadcrumbs will infuse the flavor like no other.
5. A Simple, But Easily Missed Trick
This step is easily forgotten, but so important- seasoning your mac ‘n’ cheese. Seasoning in three steps will ensure the right amount of seasoning all throughout your dish and gives it just the right amount of kick. It is always best to add your seasoning (such as salt and pepper) while making the topping, the sauce, and the macaroni.
You may love to add extras such as bacon or lobster, but this creamy macaroni and cheese alone is more than enough! It simply melts in your mouth.
A How-To: Making Hard, Aged Cheese From Scratch
You may think that making hard cheese is more difficult than making soft cheese, but there’s not much difference when it comes both of them. When making soft cheese, you have to make curds, which can be quite difficult, as opposed to the few minutes of work you have to put in with hard cheese. It is just the long wait time which makes hard cheese making, a little challenging.
 Image source: walksofitaly.com
When it comes to making hard, aged cheese from scratch, it takes some specialized equipment which you can purchase from special cheese- making suppliers.
Here’s a list of what you’ll need:
* Cheese Mold and Press- The two are quite expensive but it makes sense if you are going to be making hard cheese a lot.
* Cheese Salt- used to rub the cheese in prior to aging.
* Cheesecloth, butter muslin and a fat of your choice- used to wrap the cheese for aging.
* Waxed Paper
* Plastic Wrap
* Aluminum Foil
Pressing the curds into cheese
1. Line the mold with the damp cheese cloth.
2. Fill the cloth-lined mold to the top with cheese curds, pressing the curds down to fill all gaps. Fill mold to the top.
3. Cover the top of the curds with the extra cloth. Do this carefully to avoid any indents in the cheese.
4. Put the plastic or steel disc (that comes with the press) into the top of the mold and apply pressure for the time allocated by the specific recipe you are using. Whey will ooze out as you press, use a container to catch the liquid.
Now, it is important to follow the times the recipe advises, but if no times are provided, follow these times:
* Press for one hour at 5 pounds pressure.
* Flip the cheese, replace the mold, press for 8 to 12 hours at 20 pounds of pressure.
* Flip again, replace mold, press for 8 to 10 hours at 20 pounds of pressure.
5. Once pressing is done, remove the cheese from the mold and unwrap the cloth from around it and place it on a rack to cool off. Be sure it’s in a dark place away from drafts to air dry. Air dry according to the recipe.
Time to age your cheese!
An easy way to age cheese is by salt-rubbing. This means sprinkling salt over every inch of the cheese and rubbing it in. You then leave the cheese in a draft free, dark area for whatever time the recipe specifies.
Another way to age your cheese is to soak it in brine. This is used for cheeses with a short aging process. Brining makes bad bacteria grow on the outside of the cheese to age it further. It helps make the flavor a lot better and it develops the rind of the cheese.
* The type of brine depends on the cheese. The recipe will specify whether it is light, medium or fully saturated brine.
* Brine should be kept at 55 degrees if you want to reuse.
Whichever method you choose to age your cheese, you must remember where in your home you do this, is important. The place must be warm enough, dark, humid and completely clean. It can be as simple as a closet or in your basement. A long as the temperature is between 55 and 70 degrees, it will be a perfect place to age.
Do not get disheartened if your cheese doesn’t turn out perfect. It’s a process which takes time and patience and eventually, you’ll get a feel of what temperatures, places work best. Practice is the key to success in everything, especially Hard, Aged Cheese making.
The Age-Old Thanksgiving Debate: Turkey Stuffing vs. Turkey Dressing
Peanut butter and jelly, wine and cheese, chicken and waffles, tea and crumpets… all are individual items, but when matched with its counter, becomes a beautiful marriage. Now, enter Turkey and Stuffing, er… scratch that, Turkey and Dressing, er… wait, which one is it? Turkey and Stuffing vs Turkey and Dressing has become a heated debate, debacle and in some circumstances, seemingly an all-out, heated holiday war among family members and friends at the Thanksgiving dinner table. A number of people claim that there is no difference between stuffing and dressing, while on the opposite end of the spectrum, there is quite the difference, nearly a night and day difference, in fact. So, is there really a difference between the two iconic, holiday sides dishes?
 Source: http://i2.wp.com/plantingseedsblog.cdfa.ca.gov/wordpress/wp-content/uploads/2013/11/Turkey-and-stuff.jpg
HISTORY
Stuffing, in its basic form, is a seasoned mix that’s created to fill, or “stuff” the inside of the turkey, hence the name, “stuffing”. According to the Oxford English, “dressing” bears a much broader definition as it is referred to as a “seasoning substance used in cooking”. Well, that helps… actually, it confuses the debate even further…
WHAT’S COMMON
Turkey stuffing and dressing recipes are known to be interchangeable. The foundation of the recipe is generally a crumbled bread product of sorts, and this can be anything like cornbread, biscuits or sliced bread. The just of these recipes note the addition of chopped onions alongside celery. A number of recipes call for the sauteing of onions and celery to invoke a more tender taste, while other recipes maintain the firmness of the onions and celery.
WHAT’S DIFFERENT
The differences between the two, and there are a number, are truly what sets these two side dishes apart, finally… One of the main differences is that stuffing is actually “stuffed” into the turkey before it gets places in the oven, making the stuffing, genuinely stuffing. The dressing is generally put into a greased pan, and this becomes baked as well. Further, it is noted in the famous cookbook, “The Joy of Cooking” that the concoction is coined “stuffing” if it becomes cooked inside the turkey. The National Turkey Federation, yes… there is a federation for this bird, tends to think that the terms “stuffing” and “dressing” are quite interchangeable… again, with the indecisiveness.
A number of other ingredients can make these side dishes distinct or similar, and a good bit of the differences between stuffing and dressing could very well be dependent on the region in which they are made, for instance, southern regions of the US generally refer to the side dish as “dressing” while northern regions of the US refer to the side dish as “stuffing”. Additionally, there are recipe deviations across the board that might call for sausage, walnuts, cranberries, and even oysters.
ROUNDING IT ALL UP
When considering all that is on the table, perhaps the debate will continue on for years and even centuries. Perhaps, the age-old debate will never have a set-in-stone answer, and you know what? Maybe it’s best left an open-ended discussion for families, friends and those who appreciate the culinary arts to discuss and debate the similarities and differences for years to come. The main takeaway, though, is that either, “dressing” or “stuffing” are darn good with turkey!
Pumpkin Rolls Will Leave You “Fall”ing For More
As we begin turning the page on the final week of October, we are surely at the heart and splendor of Fall. With Fall, especially as we head through the last week of October and the great, mysterious and trick-filled holiday, that is Halloween, come pumpkins, scarecrows, jack-o-lanterns, costumes, trick-or-treat, Halloween parties, hayrides and many other festivities representative of the holiday also known as “All Hallow’s Eve”.
Before we delve into a fantastic and delicious holiday recipe I’ll share with you, I wanted to take a moment to divulge some of the lesser known history of Halloween. or as it originally was termed, “All Hallow’s Eve”. As we all know, Halloween has become holiday where people of all ages dress up in costume, go around their neighborhoods, and ring the doorbell of any house whose porch light is on and say “trick-or-treat”. The door would then open (hopefully) and the trick-or-treater would be greeted with candy or chocolate or any other kind of Halloween treat. People of all ages would do this on Halloween night until their hearts were content with the amount of Halloween goodies that had aggregated over the entirety of the night. Because of this tradition of going from house-to-house, saying trick-or-treat, and receiving treats on Halloween night, this night also became known as “Beggers’ Night”.
Now for the untold story of Halloween, and while many are versed in this story or are familiar with bits and pieces of the story, allow me to divulge the history of Halloween, in a nutshell, of course. Halloween was original called, “All Hallow’s Eve” and had more religious and spiritual meaning than it does today, as commercialism has taken over the holiday, as it does with most. The original intent of “All Hallow’s Eve” which still is observed today, for the most part, was to wear costumes and masks to disguise oneself in order to thwart off and frighten the evil or “malignant” spirits that, according to legend, roamed the world of the living for one night, “All Hallow’s Eve”. This night had a connection to the Christian Holy Day of “All Saints Day” which falls the day after Halloween. So, for all intents and purposes, All Hallow’s Eve was a night in which people dressed up to disguise themselves in mask and garb in order to scare off any evil spirits that may “stain” the purity of the Holy Day of All Saints Day. Through the years and centuries to come, as you can see, All Hallow’s Eve garnered much attention, especially through commercialism and transpired into what is known today as Halloween.
To celebrate the spirit of the holiday, here is a famous recipe for Pumpkin Rolls. A recipe that will have you begging for more!
 Photo: http://foodnetwork.sndimg.com/content/dam/images/food/fullset/2012/11/19/1/YW0202H_pumpkin-roll-recipe_s4x3.jpg
What You’ll Need:
- 3/4 cup all-purpose flour
- 1 cup granulated sugar
- 1 teaspoon baking soda
- 2 teaspoons pumpkin pie spice
- 1 cup pumpkin puree
- 3 eggs
- 1 cup plus 2 tablespoons confectioners’ sugar, divided
- 1 (8-ounce) package cream cheese, softened
- 1/2 stick butter
- 1 teaspoon vanilla extract
What To Do:
- Preheat oven to 375° F. Coat a rimmed 10″ x 15″ baking sheet with cooking spray.
- In a large bowl, combine flour, granulated sugar, baking soda, and pumpkin pie spice.
- Stir in pumpkin and eggs. Pour mixture onto prepared baking sheet, spreading evenly.
- Bake 12 to 15 minutes, or until a wooden toothpick inserted in center comes out clean.
- Remove from oven and invert onto a clean kitchen towel that has been sprinkled with 2 tablespoons confectioners’ sugar.
- While cake is still hot, roll it up in the towel jelly roll-style from the narrow end; cool on a wire rack.
- When cool, unroll cake and remove towel.
- In a small bowl with an electric mixer on medium speed, beat cream cheese, butter, vanilla, and remaining confectioners’ sugar.
- Spread onto cooled cake and immediately re-roll (without towel).
- Place on serving platter and refrigerate until ready to serve. Cut into slices just before serving.
- To give this the final touch, sprinkle on some confectioners’ sugar just before serving.
Recipe Source: http://www.mrfood.com/Cakes/Pumpkin-Spice-Roll
How to Make Delicious Banana Bread
While historians and banana bread “experts”, if there is even such a thing, claim knowledge to the origin and primitive creations of banana bread, the true origins and historical beginnings of this delicious dessert-style bread is not entirely known, albeit large doses of speculation exist at the forefront. What we do know is that banana bread is a a moist and delicious after-meal eat.
One thing we do know is that history of bananas gives us insight that bananas have been around and a mainstay of agriculture for about the last 200+ years.With the birth and inception of such ingredients as baking powder ad baking soda, came the invention of banana bread. When baking banana bread, the ideal bananas are not the green ones that came in just hours ago, but the ones that are soft, yellow and much more ripened and appear golden-yellow in color. Bananas tend to ripen very quickly. A good practice is when you have very green (not yet ripe) bananas, place them in a brown paper bag and they will nearly-instantly begin turning ripe, albeit, by “instantly”, we’re looking at about 12 hours in a brown bag, rather than 12 minutes.
Essentially, a banana muffin recipe nearly parallels banana bread as it exhorts a very similar texture and flavor. A critical component to both recipes (banana muffin and banana bread) is to mix the ingredients when dry with wet ingredients only until they become blended with each other. Of both recipes, banana muffins seem to be the easier recipe. Banana bread and banana muffins are a great breakfast item and a very easy to grab, on-the-go food. Both recipes are taken to an entirely different level when nuts are added, increasing the moisture and sweetness of the bread and muffins.
Here is some recipes for banana bread, banana muffins and all-bran banana bread:
HOW TO MAKE BANANA BREAD
- 2 bananas (ripened, yellow-look)
- 1 cup of sugar
- ½ cup of oil
- 2 eggs
- 2 cups of flour
- 3 teaspoons of baking powder
- 1/8 Teaspoon salt
- 1 Cup chopped nuts
- Preheat oven to 350°F degrees.
- Grease and lightly flour bread loaf pan.
- Mash ripe bananas in a bowl; add sugar, oil, and eggs and beat until smooth.
- Sift together the flour, baking powder and salt; stir in the nuts
- Combine the dry mixture with the banana mixture and stir in until blended.
- Pour batter into prepared pan and bake for 60 minutes or until pick comes out clean.
__________________________________________________
BANANA MUFFIN RECIPE
When I learned how to make banana bread, here is my muffin recipe.
- 1/3 cup of sugar
- 1 ¾ cups of flour
- 2 teaspoons of baking powder
- ¼ teaspoon of salt
- 1 beaten egg
- ½ cup of milk
- ¼ cup of cooking oil
- ¾ cup of mashed ripe bananas
- ½ cup of chopped nuts
- Preheat oven to 400°F degrees.
- Line muffin tins with paper liners.
- Combine in a mixing bowl flour, sugar, baking powder, salt and nuts; Blend and make a well in the center.
- Combine in another bowl the milk, egg, oil and bananas; blend well.
- Add the banana mixture all at once in the well of the dry ingredients; stir just until moist.
- Fill prepared muffin tins 2/3 full and bake about 20 minutes or until pick comes out clean.
__________________________________________________
ALL BRAN BANANA BREAD RECIPE

- ¼ Cup solid shortening
- ½ Cup sugar
- 1 Egg
- 1 Cup All Bran Cereal
- 1 ½ Cups mashed bananas
- 1 Teaspoon vanilla
- 1 ½ Cups flour
- 2 Teaspoons baking powder
- ½ Teaspoon salt
- ½ Teaspoon baking soda
- ½ Cup chopped nuts
- Preheat oven to 350°F degrees; grease loaf pan.
- Sift together flour, baking powder, salt, baking soda; stir in the bran and nuts and set aside.
- Cream shortening and sugar; ad egg and beat well.
- Add mashed bananas and vanilla; beat until well blended.
- Add dry ingredients and mix with a spoon until well blended.
- Spoon batter into prepared loaf pan and bake about 1 hour or until the pick comes out clean.

