Category: Cheese history
Have You Ever Tried Brie Pie?
This rich and luxurious pie is not your average pie. In fact, pies in the U.S are usually eaten for dessert, but Brie pie is more of an appetizer or entree.

Luckily, like a lot of the delicious appetizers on offer, this one is fairly simple to create and has an amazing payoff. It may look quite difficult, but it only entails wrapping a wheel of brie in a thawed sheet of puff pastry and cooking it until golden. Even if it was difficult to create, the combination of warm melted cheese inside of a crispy pastry is impossible to resist and worth every effort.
The type of Brie you get isn’t too important, a rule of thumb would be to buy one that fits your hand and looks good to wrap in pastry.
Let’s get right to it and create this cheesy masterpiece!
Recipe
What You Need
8 oz of Brie
1 sheet puff pastry, thawed
All-purpose flour
1 large egg, beaten
What To Do
Firstly, preheat oven to 400 F, making sure the oven rack is in the middle of the oven. Now line a baking sheet with parchment and set it aside.
Start by rolling out the puff pastry, using the flour to dust out on the counter and then sprinkle some more flour on top to the pastry to aid rolling further. Roll the pastry so that it measures around 11 x 11 inches to make sure it fits around the Brie.
Now it is time to wrap the brie in pastry. Place the wheel of brie in the middle of the pastry and fold the corners over the brie, creating a neat package. Press against the edges gently and neaten the sides up.
Brush the pastry over with the beaten egg, making sure you get the sides and transfer the pie to the baking sheet.
Bake the pie for around 35-40 minutes or until golden brown.
Now allow cooling for 5 to 10 minutes which will give the hot cheese time to firm up.
Transfer it to a serving platter and serve it warm.
Try Something Deliciously Different: Baked Tomatoes Stuffed With Goat Cheese Fondue
This simple recipe is perfect for the summer, combining fresh goat cheese and mascarpone in a fondue melt with ripe, juicy tomatoes. Just imagine sitting out in the sunshine having a cookout with all your friends and family, this will be the perfect dish to bring! It is different, impressive and easy to make, so give it a try and enjoy!

Recipe
What You Need
3 large, firm tomatoes
3 tbsp. mascarpone
3 tbsp. goat cheese at room temperature
Kosher salt
1 tbsp. virgin olive oil
1 tbsp. unsalted butter
2 anchovies, chopped finely
2 garlic cloves, chopped finely
Ground black pepper
1/4 cup panko or other bread crumbs
What To Do
Firstly, preheat the oven to 500 F.
Now slice a thin layer off the bottoms of tomatoes so they will easily stand upright and then remove the insides of the tomatoes, carving them out to up to about 3/4 inch from bottom and sides. Be careful not to take out too much of the insides so that the tomato will stay upright when cooked.
Now, using the salt, season each tomato. After this, mix the goat cheese and mascarpone together in a small bowl.
It is now time to prepare the topping. Firstly, melt the butter with the oil over medium high heat. Add the anchovies, garlic and cook for 30 seconds while stirring. Now stir in the bread crumbs and cook for 2 minutes. Season with pepper.
Fill the tomatoes with the mascarpone mixture and top them off with bread crumbs. Now place the tomatoes on a baking sheet and bake them for about 10 minutes or until golden.
7 Rules To Live By When Dealing With Cheese
1. A very important and fairly obvious rule is to not put unwrapped cheese in the fridge. The cheese would not only be exposed to potential bacteria, but it would become hard and dry out, making it inedible.

2. Don’t wrap your cheese in saran wrap! Although it is a very common practice to wrap cheese in saran wrap, with it being the easiest way to repackage food, replacing it with cheese paper or baking paper is the best way to go. This is because the paper allows the cheese to breathe and it won’t dry out.

3. It is also important to use separate utensils for each cheese. It may not seem very important but when you are eating a variety of cheese from a board, it can definitely affect the taste and ruin the experience of all the delightful flavors to offer.

4. Never serve cheese straight from the fridge. Like red wine, you just simply are not getting all from that expensive treat you bought if it is consumed straight from the fridge. It’d be an unpleasant, stone cold rock, with a lack of flavor, aroma or texture. For example, if you were to eat brie straight from the fridge, it would be hard and lacking flavor, whereas after being left out for around an hour, it is soft and delicious.

5. Don’t freeze fresh cheese. Fresh cheese is volatile as it is and just after one day, fresh cheese like feta and mozzarella will start to lose their moisture and become rubbery. The best way to remedy this is to soak the cheese for an hour in warm, salted milk. This will bring back the moisture and burst of flavors you lost while refrigerating.

6. Buying grated cheese isn’t the best idea, nor the cheapest. When you buy a full block of cheese, it keeps fresher for a lot longer and is a lot cheaper. Not only that but a block of cheese tends to be a lot better quality than grated, with more flavor and aroma and no artificially added extras.

7. Try to keep cheese in a block for as long as possible. Cutting cheese into slices allows the cheese to dry out fast. Even when serving it on a platter, it is best to keep it in a block so the cheese can be enjoyed in its best form, especially since the most flavor is at the center of the cheese.

Creating Mouthwatering Halloumi
Halloumi originates from the island of Cyprus and tends to be a semi-hard, unripened, and brined cheese. It is unique for having a high melting point which means it can be easily grilled or fried- perfect for summer cookouts! What makes it better is because it doesn’t melt, it keeps its texture and shape, keeping the incredible flavor and soft insides.
Although Halloumi has been around for a long time, it is particularly getting more popular over in the western countries because there has been a rise in vegetarians, it acts as a delicious meat substitute.
This cheese is traditionally made with ewe’s milk and added cow’s milk, but it is perfectly fine to make it with just 100% cow’s milk since that is more readily available. You can even substitute the milk for your own desired type. In this recipe though, 1 gallon of cow’s milk will be used for a trial run to see if you enjoy the cheese, ingredients can easily be adjusted to fit the amount of milk you would like to use.

Recipe
What You Need
1 Gallon of Milk (not ultra-pasteurized)
1/4 Tsp Single Strength Liquid Rennet (1/8 tsp for raw milk)
1 Pack C21 Buttermilk Culture or 1/4 tsp MA4002 (no culture for raw milk)
3/8 Tsp Calcium Chloride for Pasteurized Milk
1/8 Tsp Citric Acid (for Whey Ricotta)
1/2 oz Salt
Equipment
Knife to cut curds
Large colander
Ladle or spoon to stir curds
Thermometer
What To Do
1. To begin, place your milk in a pot and heat it to around 88 degrees F. Be sure to hear slowly and stir well if heating on a stove.
Once your milk has reached the desired temperature, add the culture. The culture will be destroyed by the milk and the curds will become higher in temperature. However, they will provide special enzymes for ripening if the cheese is preserved for a short period of time.
Also, if you are adding calcium chloride or lipase, add them in this step and stir to incorporate it well into the milk.
2. Now, add the liquid rennet to a diluted 1/4 cup of water. This will begin the coagulation process. It will take approximately 30-40 minutes for total coagulation but you will notice the milk begins to thicken within 20 minutes.
3. The curds can now be cut to .75- 1.5 inch squared in a vertical manner. Then allow to stand for 5 minutes to heal and then using your ladle, cut horizontally into even sized cubes.
4. Time to cook the curds and remove the whey. Stir gently, increasing the heat slowly to 100 degrees F during 20-30 minutes.
Keep this temperature for another 20-30 minutes while stirring every 3-5 minutes.
Once that time period is over, allow the curds to settle for 5 minutes under the whey.
Cooking the cheese in hot whey is very important for the making of Halloumi, so beginning to filter off the whey from the curds is the next step. You can do this with a sanitized colander and just scoop the whey out with a ladle, cup or bowl.
Now that the whey has been separated, slowly heat the whey to 195 degrees F, without letting it boil.
5. The curds which are dry can be transferred to their form from draining. Light pressure from your hands will help the consolidation of curd and make more than 1 form, they can be stacked and reversed for a little weight.
You can allow the curds to rest with a little weight, stalking them in forms. Make sure you turn them at 20-minute intervals to form a well-consolidated cheese.
6. After the whey has been heated, it is time to give the Halloumi its true form by heating the whey for 30-40 more minutes, keeping it at a temperature of 195 degrees F for the time it takes to cook all the pieces of Halloumi. Use a ladle to keep the cheese off the bottom of the heating pot and then lower it into the whey. At first, the cheese will float to the bottom, but as it cooks, it will eventually float to the surface.
Once it floats, that means it is ready to be removed. Cool the cheese for a few seconds in cold water and then lay it on a draining mat to cool and drain a bit more.
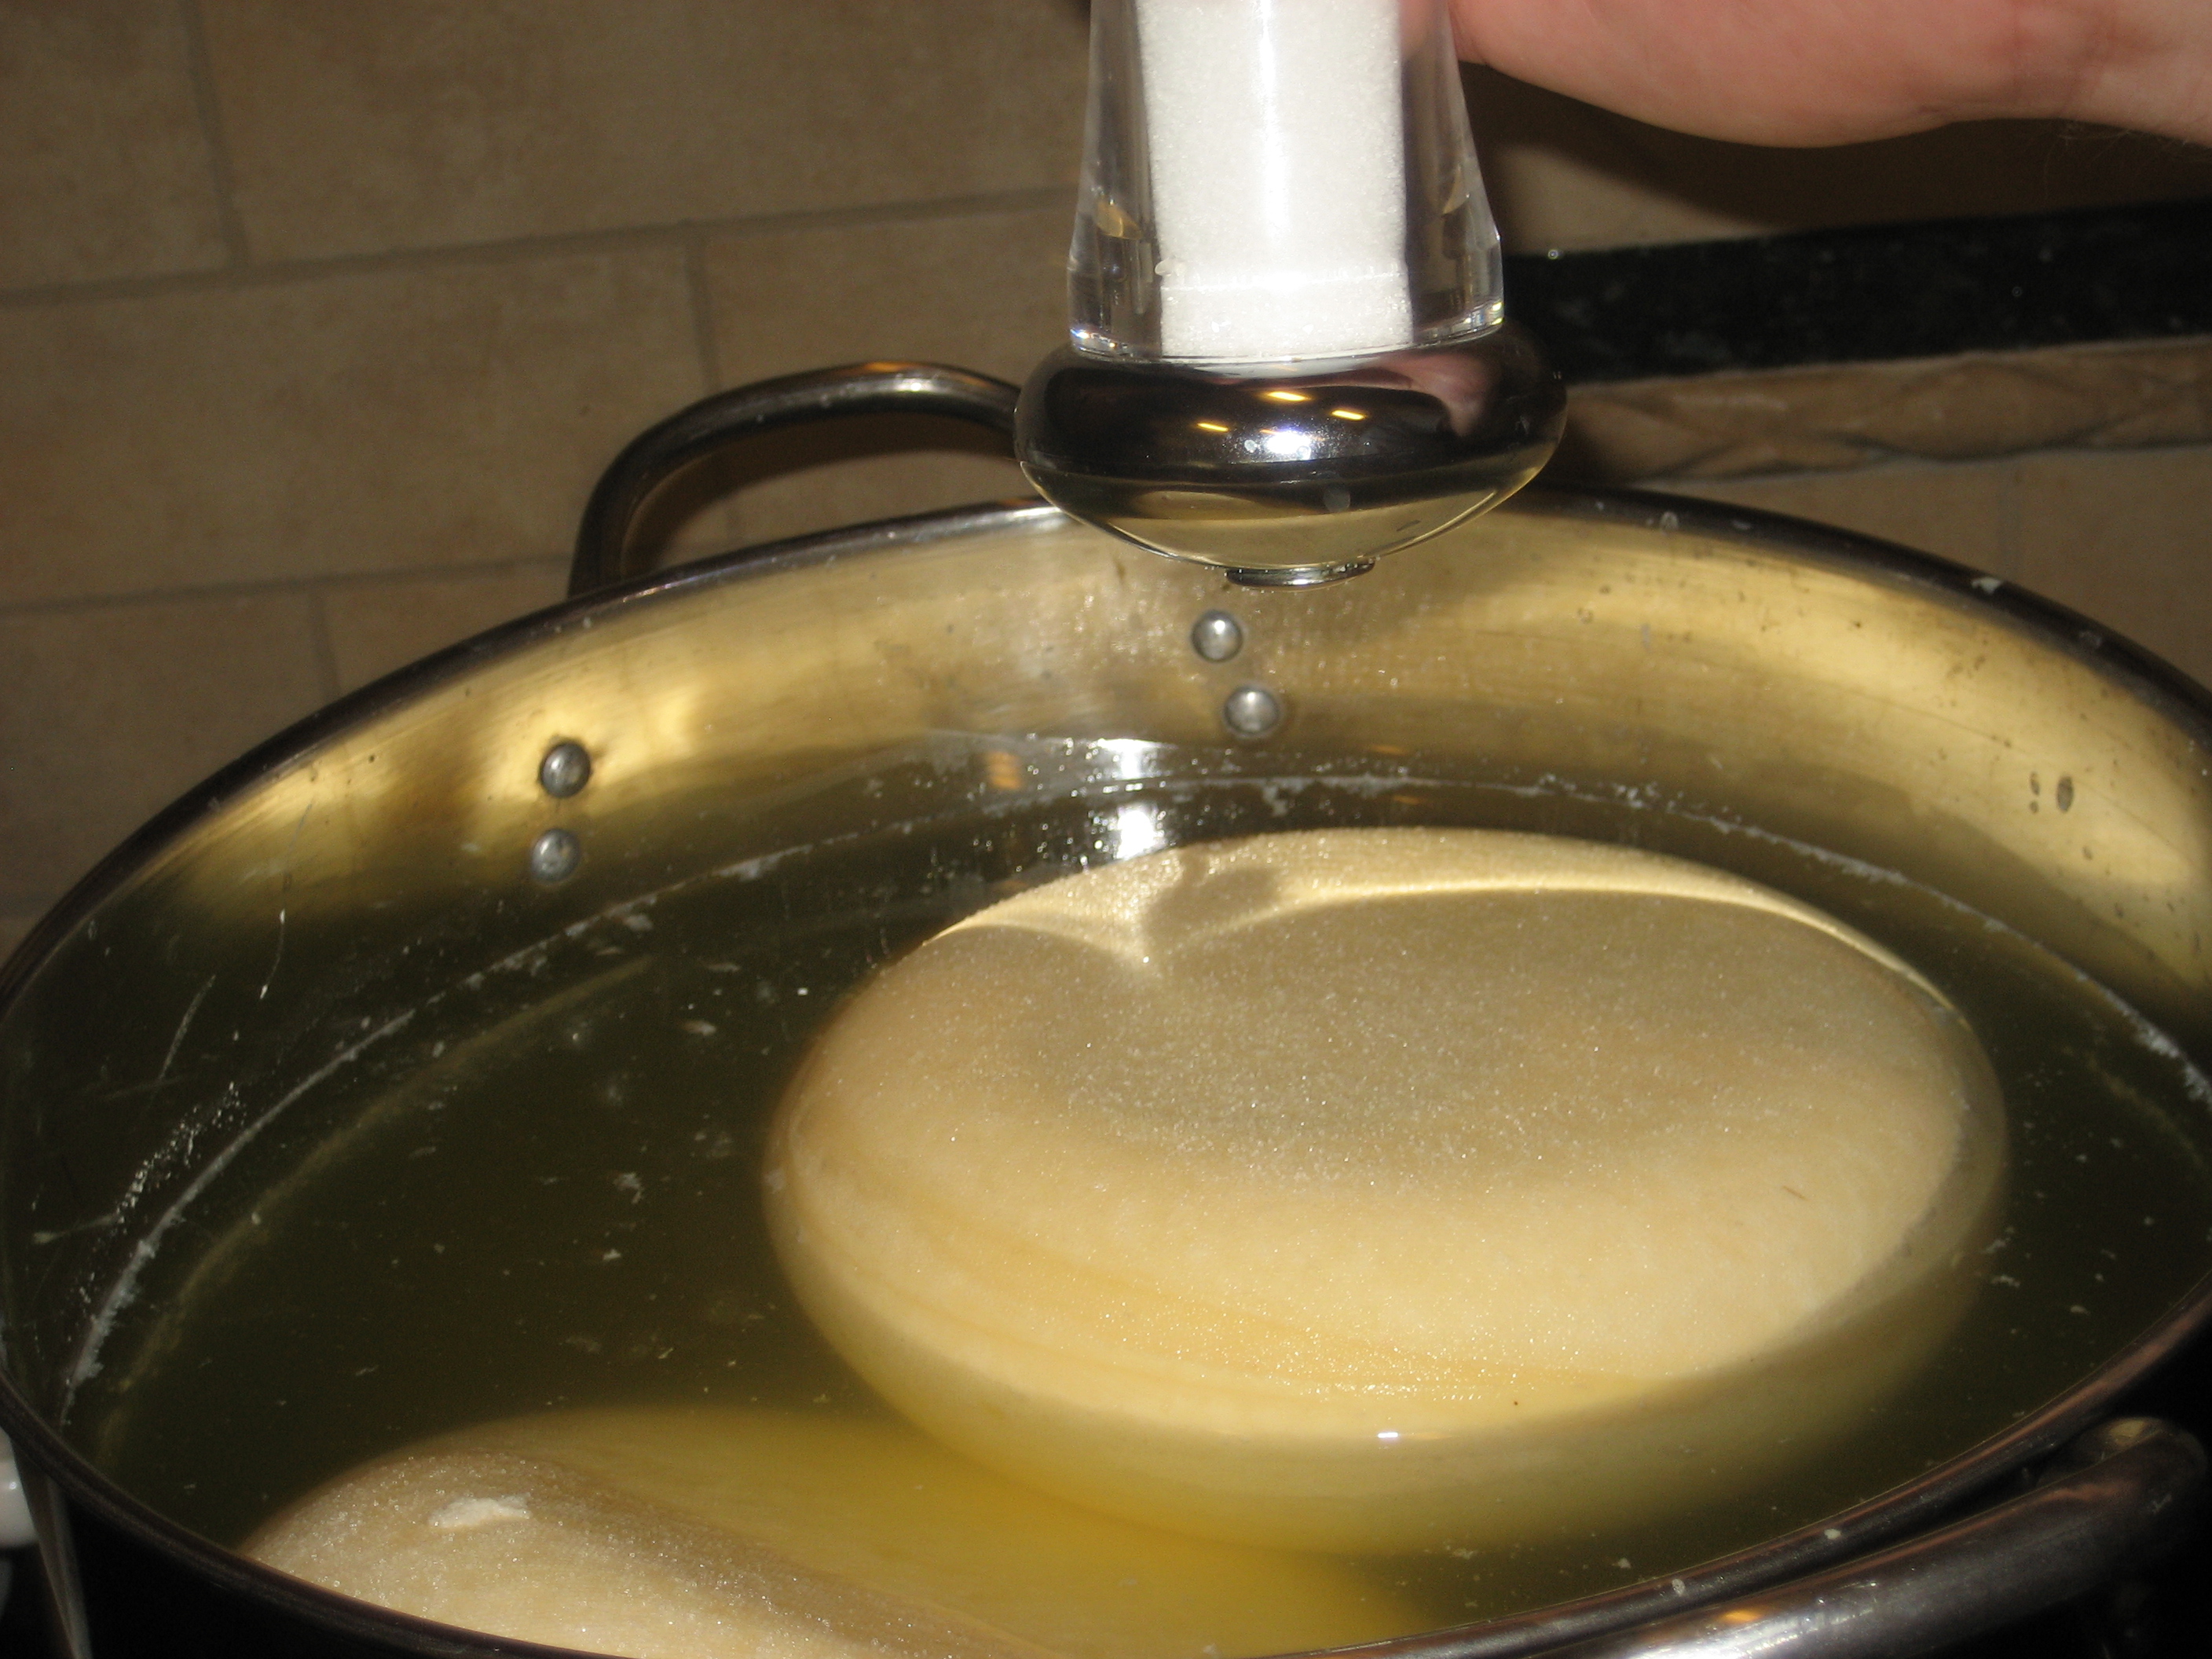
7. While you are cooling the cheese, and it is still warm, flatten with your hand to form a larger, flatter disc of cheese.
Now finish it off by sprinkling the cheese with salt and folding it into a crescent and pressing slightly as it cools.
8. Now your cheese is done, after a 3-5 day process. You can keep it refrigerated if it is lightly salted. If you are wanting to store it more traditionally, at room temperature, the higher amount of salt will keep it well for several days.
Pasteurized Or Unpasteurized- Which Is Best?
At Shisler’s Cheese House, we home a number of cheeses soft, hard, blue- you name it. These cheeses are either made with pasteurized or unpasteurized milk, it usually comes down to the cheesemakers choice, however, some regulations restrict cheesemakers, for example, Stilton has to be made with pasteurized milk and Comte, which has been subject to many controversies, has to be made using unpasteurized milk.
The biggest wonders that come up when discussing the two kinds of milk are first, is pasteurized milk safer than unpasteurized milk? Secondly, does cheese being made with unpasteurized milk taste better?
The most important subject to discuss is obviously if pasteurized milk is safer. It is not an easily answered question, you need to look at the risks and safety concerns surrounding unpasteurized milk, first.
It is common that cheesemaking rooms will contain lots of different bacteria, mainly good bacteria, but then there are quite a few bad bacterias. Some of the bad bacterias that may be present can contaminate milk or cheese with E-coli, Salmonella, and Listeria. However, there are ways to keep these under control and minimize the risks. Some of these ways are actually part of the cheesemaking processes, such as salt dehydrates, these help a lot because a lot of bacteria requires moisture to thrive. Other processes include appropriate procedures during the handling of the milk, the cheesemaking and the maturing of the cheese, shipping, and packaging.
What Is Pasteurisation?

Pasteurization is the process of heating the milk to around 160 degrees Fahrenheit for 15-25 seconds. This is to kill the pathogens which were mentioned above, not only that, but it kills pretty much everything else, which can be bad as some are important in cheesemaking as they act as a natural defense which comes from the milk. This process also allows for more errors as cheesemakers can become complacent which increases contamination risks. However, that being said, all cheesemakers that Shisler’s Cheese House works with, are never complacent and work to a high and safe standard at all times.
The main thing we believe is that with the safe and controlled handling of milk and cheese, whether it is pasteurized or not, the outcome will be the cheese that is safe to eat, with no significant risks either way.
Does Unpasteurised Milk Taste Better?

This question is equally as challenging as the previous one. Tying it back into how the process of pasteurization kills all bacteria, good and bad, a lot of friendly cultures essential for tasty cheese are destroyed and therefore they have to be reintroduced back into the milk after pasteurization. However, this still doesn’t help because the microflora is damaged and not passed onto the cheese no matter what. This poses a potential drawback in using pasteurized milk. That being said, it’s not justifiable to just say that unpasteurized milk is better, it is indeed a big factor for great cheese which has the potential to make better cheese. Then again, there are many amazing pasteurized milk kinds of cheese because of the skill of the cheesemaker.
In conclusion, cheeses which are made with unpasteurized milk are equally as safe to eat as those made with pasteurized milk and cheese which is made with unpasteurized milk has potential to taste better but that is just one of the factors that go towards the overall quality of cheese.
Get Cheesy This Fourth Of July!
With the 4th of July being a huge milestone in our country’s history, it is a day where families and friends get together and celebrate it at parades, cookouts, parties- you name it! And the biggest things that center these celebrations are food, alcohol, and fireworks (in no particular order!)

Now, focusing on the food aspect which I’m sure we are all most excited for, let’s take a look at one particular dish which is not only patriotic but also a cheesy delight. Here is a delicious cheese dip that you can make ahead of time so you only have to warm it up before the festivities.
The best cheese found for this delicious dip has got to be our White Cheddar at Shisler’s Cheese House. With its sharp flavor, it really pairs well with the sweet Vidalia onions which are also used in this recipe.
This cheese is so high quality and has such a creamy texture and flavor that it makes it perfect for this recipe as it focuses mainly around the cheese. Not only that but it is a great melting cheese, as discussed in some of our other articles, the type of cheese you melt is important, as not all melt the same or at all. You might know already about how good white cheddar is for melting with it being the season for grilling!
To impress even more at your event, you can keep it festive by making your own tortilla chips to go with the dip. It is very easy, all you have to do is take some flour tortillas and a star cutter and go nuts! You bake for a few minutes on 350 or until they begin to become golden.
Be warned, these are addictive so you might want to make a lot! Enjoy!
Recipe For Cheese Dip

What You Need
-
1-1/2 cups Cracker Barrel Vermont White Cheddar Cheese, shredded
-
1/3 cup mayonnaise
-
3 ounces cream cheese, softened
-
1/3 cup diced Vidalia onion
-
1/2 teaspoon pepper
-
1/4 teaspoon herbs de Provence
-
1/4 teaspoon creole seasoning
What To Do
1. Mix all ingredients fully and place in a baking dish.
2. Bake for 25-30 minutes at 375 degrees or until golden.
How The Aging Process Works
As they say in the real world, age doesn’t matter. However, in the cheese world, it truly does matter. Aging, otherwise called ripening is one of the most important parts when producing cheese. When we set cheeses to mature in controlled environments, they begin to develop their unique textures, appearances, aromas, and flavors. For example, when Swiss cheese ages, holes begin to form and it firms up.
Timing

The scientific processes of when cheese ages are as followed: the enzymes and microbes develop inside the cheese and breaks down milk fat and proteins into a complex mix of amino and fatty acids. In simpler terms, aging basically transforms the texture of the cheese and intensifies the flavor.
For most cheeses, the aging period usually requires two weeks to two years in order to develop their unique attributes. When cheese ages it generally gets a lot more firm and distinctive in flavor and aroma. When aged for 24+ months, Parmigiano Reggiano becomes a lot more complex, developing a fruity taste alongside a gritty, firm texture. Not every cheese is aged though, mild cheese like cream cheese, cottage cheese and ricotta aren’t aged at all and are consumed when fresh.
Temperature

Temperature is very important when it comes to aging. Cheese is stored in cellar or cave type environments which have a closely monitored temperature and humidity. Not all environments are the same though, it all depends on what type of cheese is being made. When it comes to aging, soft cheeses, cooler temperatures are used and the process takes a lot longer because you must age soft cheeses slower to avoid bacteria, in a result of high moisture. If you want to age firm cheeses, high temperatures are used to get rid of excess moisture.
For general aging, the temperatures of the environments that aging takes place in a range between 10 degrees C to 15 degrees C. High moisture conditions are pretty normal, along with at least 80% humidity upwards.
Aging Techniques
Like many things, there are different ways to age cheese. Lots of different techniques are used to make many of the amazing cheeses we love. There are two main techniques which are called surface ripening and interior ripening.
For surface ripening, the aging begins on the outside of the cheese and progresses towards the inside. To encourage the growth of rind, microorganisms are rubbed onto the outer surface of the cheese. Brie, Munster, Morbier are an example of surface ripened cheeses which are also washed in a saltwater brine during the process. Sometimes, the brine is seasoned with wine and spices which carry flavor into the cheese and nurtures bacterial growth.
When it comes to interior-ripened cheeses, it is opposite to surface ripening and begins from the inside of the cheese and moves outward. The cheese is coated with wax to prevent further oxygen action on the surface, once it is done aging. Examples of an interior- ripened cheeses are Cheddar and Swiss.
For interior-ripened blue cheeses such as Gorgonzola, Stilton, and Roquefort, they contain additional bacteria and molds introduced to them during an aging period. Sometimes, the Penicillium molds are injected into the curd whereas other times, the microbes are already present in the air and grow within the aging cheese. For these molds, they grow into small fissures within the cheese, creating the famous blue-green veins and sharp flavor throughout the cheese.
Have You Tried These Imported Cheeses?
Although importing cheeses is not exactly the greatest thing for the environment, it is great having so many amazing choices. Importing and exporting opens up new worlds, new realities for all of us cheese lovers. Even then, with so much choice, we can sometimes stick to the safe options and what we know; with this, we should definitely experiment and broaden our horizons.
Here are some of the best imported cheese with great variety at the same time:
Italian

Fontina
Although other countries produce their own version of this cheese, Italy’s version is definitely one of a kind, identified by its stamp. This semi-soft cow’s milk cheese has a rind that forms naturally because of the aging process, the interior color is yellow or orange-brown. The texture is different depending on the age. When it is younger, the cheese is a lot more flexible and melts well, so it is ideal for fondues or casserole dishes. When the cheese is matured, it is firmer and grates well.
Caciocavallo
This is a semi-hard cheese which is made from either cow’s or more interestingly- ewes milk. The process which is used when producing this cheese involves spinning the crafted cheese strings into pear shapes that are then cured in brine or salt for a couple days. The string is then tied around the neck to create a separate ball above the main boy of cheese. It is then aged by being hung over poles.
Spanish

Valdeon
This blue cheese is made from goat’s and cow’s milk. It comes from the Picos de Europa mountain range, being mature in limestone caves, traditionally, for at least 2 months. The flavor is tangy and earns its place on a cheeseboard or fits perfect in recipes which need blue cheese.
The Drunken Goat
I know what you’re thinking, what a strange name! However, despite all the things a drunken goat could mean, this is a goat’s milk cheese from the Spanish Mediterranean coast. This cheese has a purple rind and gets the ‘drunken’ from the fact that it is cured in red wine. See, it wasn’t what you thought and is delicious in every way!
French

Boulette d’Avesnes
From the village of Avesnes near the Belgian border, this iconic cheese is shaped into conical parcels. It is a case of the notion that if you don’t mind a very stinky cheese with a strong, spicy taste, then you will enjoy it! It is produced from the damaged whey of curds that is then mashed with spices and herbs. It is then washed every week in beer and matured for around 4 months.
Banon
Like many kinds of cheese, Banon is named after the village of origin. It was first produced in 1270 and is made from cow’s milk with a strong woody flavor to it. The texture is soft with earthy aromas. When being produced, the cheese is molded by hand before the maturing process begins. After the maturing stage, the cheese is then wrapped in dried chestnut leaves to continue maturing for a further 2 weeks.
If this delicious list isn’t enough for you to try, here are a few more options!
– Delft Blue- Holland
– Trappistenkase- Germany
– Tete de Moine- Switzerland
– Bergkase- Austria
Delicious Belgian Cheese
Belgium is not only famous for its rich chocolate but its fabulous cheese as well. Although Belgium is a small country, it makes over 300 different varieties of cheese, almost the same amount as France! The reason Belgium cheeses aren’t as well known as other European countries is that they produce very small amounts of the cheese and very rarely export them out of the country.
You could say that the cheese in Belgium are exclusive and if you are lucky enough to be able to visit Belgium or your local cheese store has a few samples, here is a list of the best cheeses Belgium has to offer:
Herve

The name of this cheese comes directly from the town in which it is made. Herve is one of the most popular cheeses of Belgium, is made from cow’s milk cheese, it comes in the shape of a brick with a reddish brown coating which is formed by bacteria during the aging period. Quite often, Herve is described as similar to Limburger as it has a pale yellow, soft interior and a strong smell to it. The cheese is quite sweet when it is young but as it ages, the flavor deepens, becoming quite spicy. A good pairing would be beers and dark bread.
Beauvoorde

The style of this cheese is quite traditional despite it being newer to the Belgium cheese market. This creamy cheese was made by an innkeeper in from Beauvoorde Village, in the 1990s. It is a semi-hard cheese made from cow’s milk with a hexagonal shape and a natural gray rind around it. The flavors are mild with a spicy aroma. It will make good for a cheese plate or a simple sandwich cheese.
Limburger

Even though Limburger is readily made and available in the United States, this stinky, legendary cheese actually comes from Belgium originally. This pungent cheese is made from cow’s milk and has a soft, yellow interior. Despite having notes of sweetness, Limburger is quite meaty and spicy. On the outside, the texture is smooth and sticky, ranging in color from reddish-brown to yellow, it also has corrugated ridges. Although Limburger is an acquired taste, it is definitely a must try as the full flavor might definitely win you over.
Brusselse Kaas


This soft cow’s milk cheese is also known as Fromage de Bruxelles. The creation of this cheese is somewhat unique, with it being repeatedly washed and dried during the maturation period of 3 months. In result of this, it has a very smooth texture with a sharp flavor. The shape is often round because of the tubs the cheese is placed in. It can be a great snacking cheese or good for spreading on bread.
Rubens

There is no better way to honor a famous artist than to name a delicious cheese after them. That artist is the Flemish painter Peter Paul Rubens, the most popular painter in 17th century Europe. The cheese is made into small rounds with a reddish brown rind encasing it.
Passendale

The name of this cheese comes from the village of Passchendaele. It is a semi-soft cow’s milk cheese which resembles a load of bread with a hard, edible brown rind. One of Belgium’s best-known cheeses, the texture is smooth and fresh with dotted holes in the interior with a mild flavor.
Maredsous

This soft cow’s milk cheese is traditionally made by monks, originating from the Maredsous Abbey in Belgium. Being served as a table cheese frequently, the loaf shaped cheese has a bright orange color which is washed with brine and lightly pressed.
Prince-Jean

Prince-Jean is a fresh cow’s milk cheese which is made in modern creameries. This rich, triple cream cheese is divine in all its velvety pleasure. The aroma is pungent with a white mold surface. Another version of the cheese is also made with peppercorns, it is much softer.
Cheese And Tequila- A Match Made In Heaven?
Definitely not what you expected, right? You’re most likely thinking that only wine or beer are good to pair with cheese, but that is not true. Although there isn’t a big history of cheese and tequila being paired together, delicious notes of your favorite tequilas, from caramel sweet to floral, actually do make a perfect pairing to some of your favorite cheese.


